How to mod The Witcher 3 and make it look beautiful


Rumors have been circulating recently regarding a potential third expansion for the game, ten years after the date of its initial release. The developers are also working hard to provide mod support for those who are on console. With this information in mind, it seemed the perfect time to write a guide on how to mod the game and share my personal mod list.
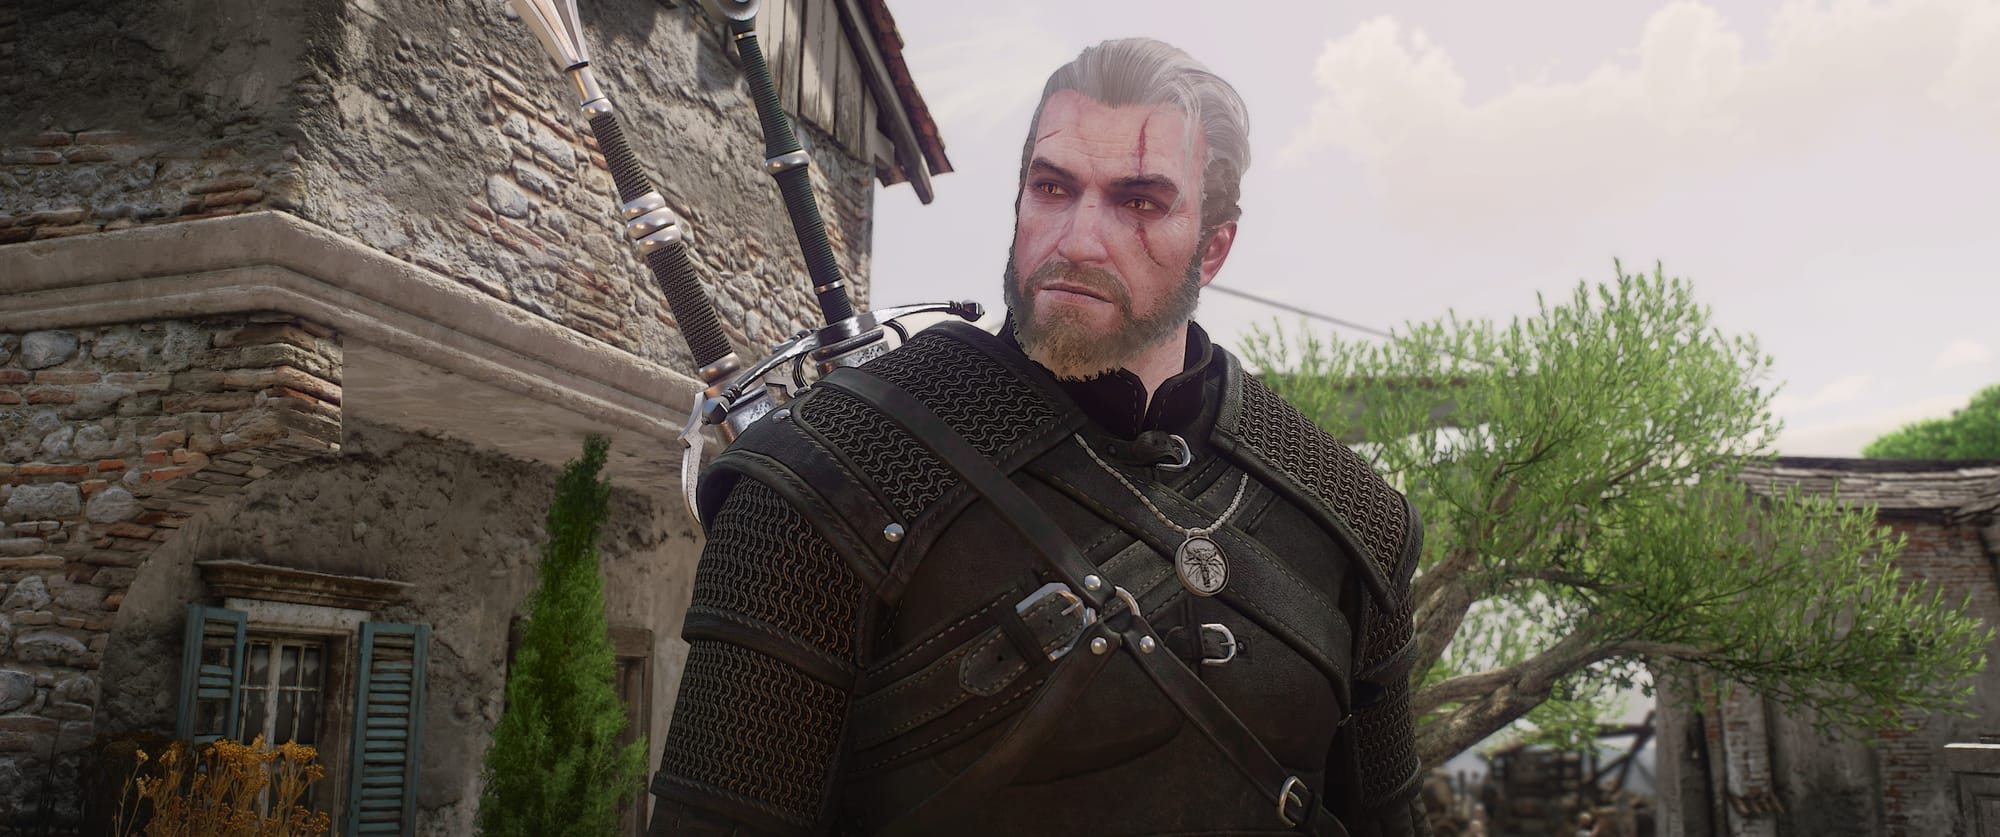
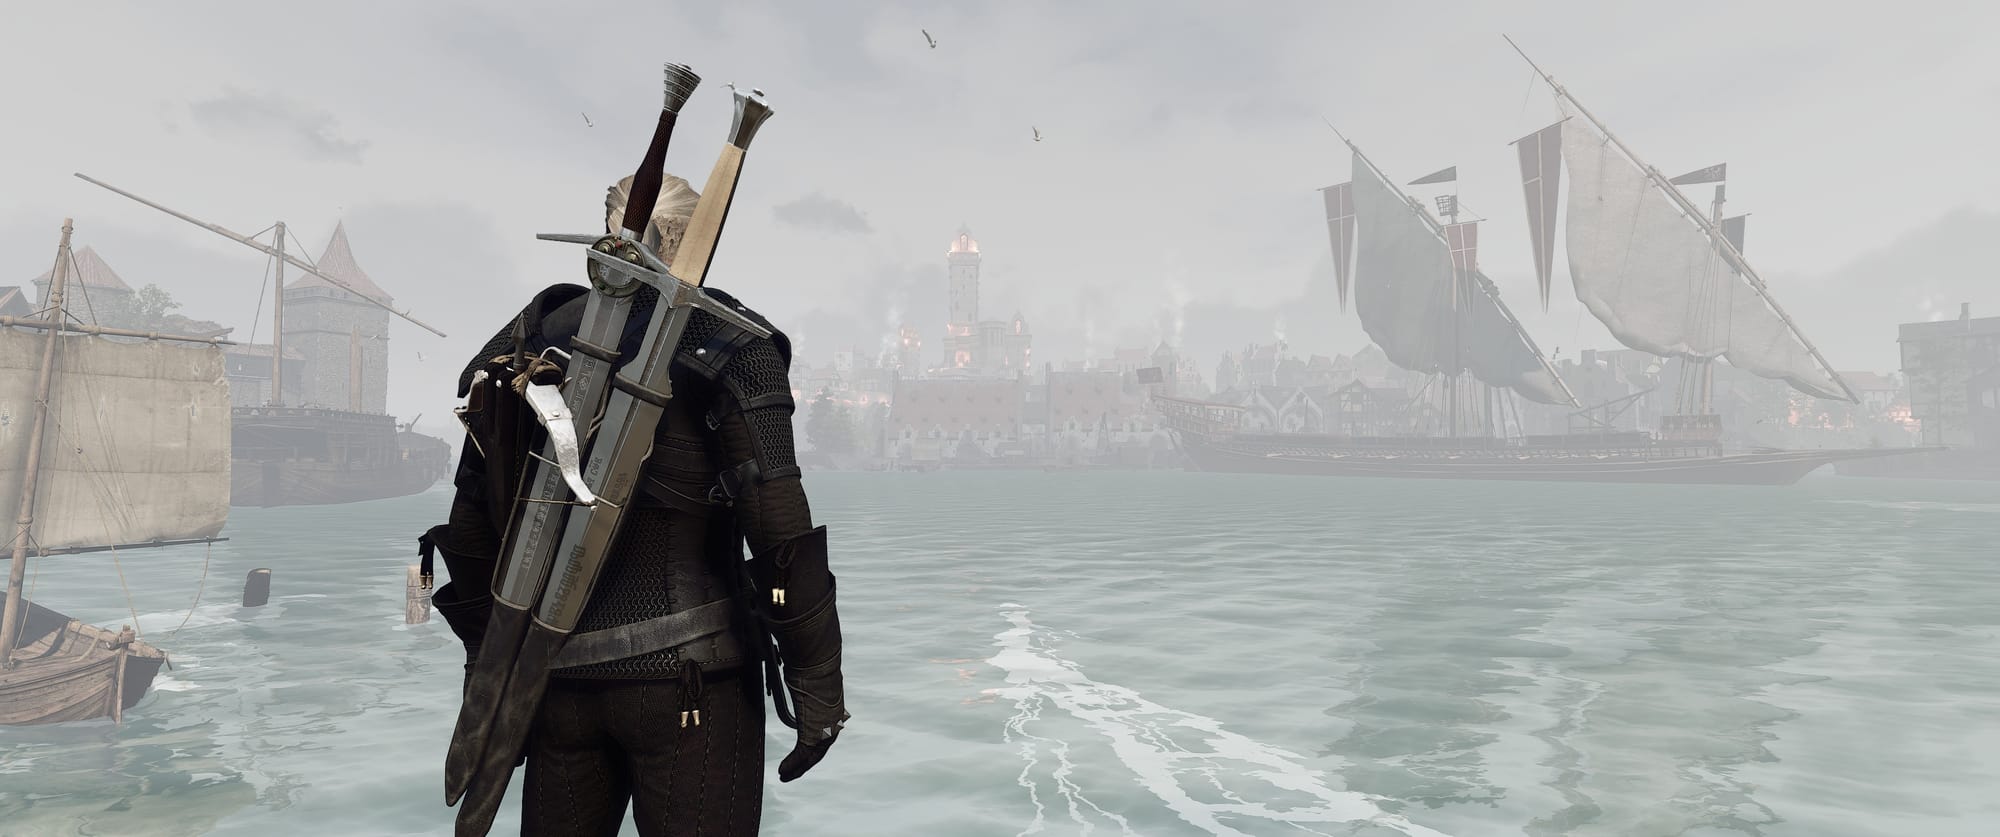
Since I love the vanilla mechanics already, the mod list mostly focuses on touching the graphics only. So if you would like to play the game as the developers originally intended but with beautiful graphics, then this mod list is perfectly suited for you.
In addition to teaching you how to install mods for the game, it will also show you how to do so on Linux – specifically Ubuntu 24.04. However everything you learn here can be applied on Windows as well, so do not fret if you are not yet part of the Linux club.
Since I don't have a MacBook I am unable to test this guide for you Apple users, but you are more than welcome to give it a go. I'm not so sure how the performance would be though.
Lastly, this guide is for the Steam version of the game. If you have the GOG version you may still be able to follow along by adding the game as a non-steam game.
For the purpose of this guide, we will focus on these five steps.
- Preparing the game
- Installing mods
- Mod priority
- Script merger
- The mod list
For each section I will provide links to the relevant tools and mods. If you have anything you would like to share or if you have any questions, feel free to comment below. I will do my best to respond when I can.
If you are interested, I've also provided a PDF copy of the mod list. You can download this here. It also includes a basic version of this guide.
Preparing The Witcher 3
To begin with, the game must be installed on your system. Go ahead and install the game via Steam.
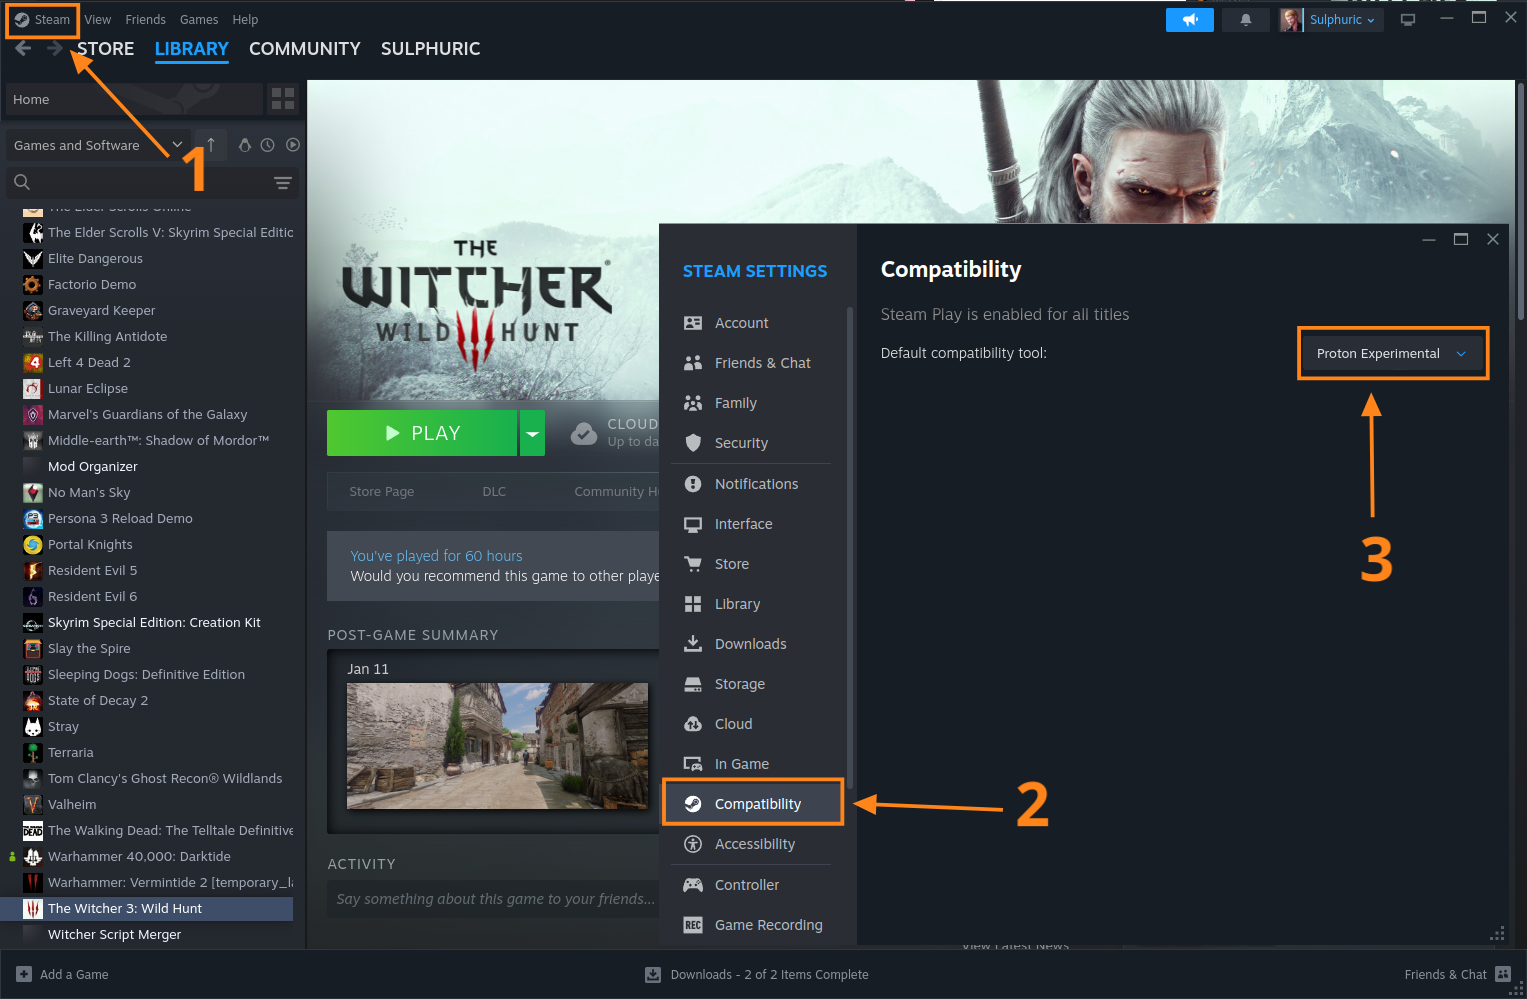
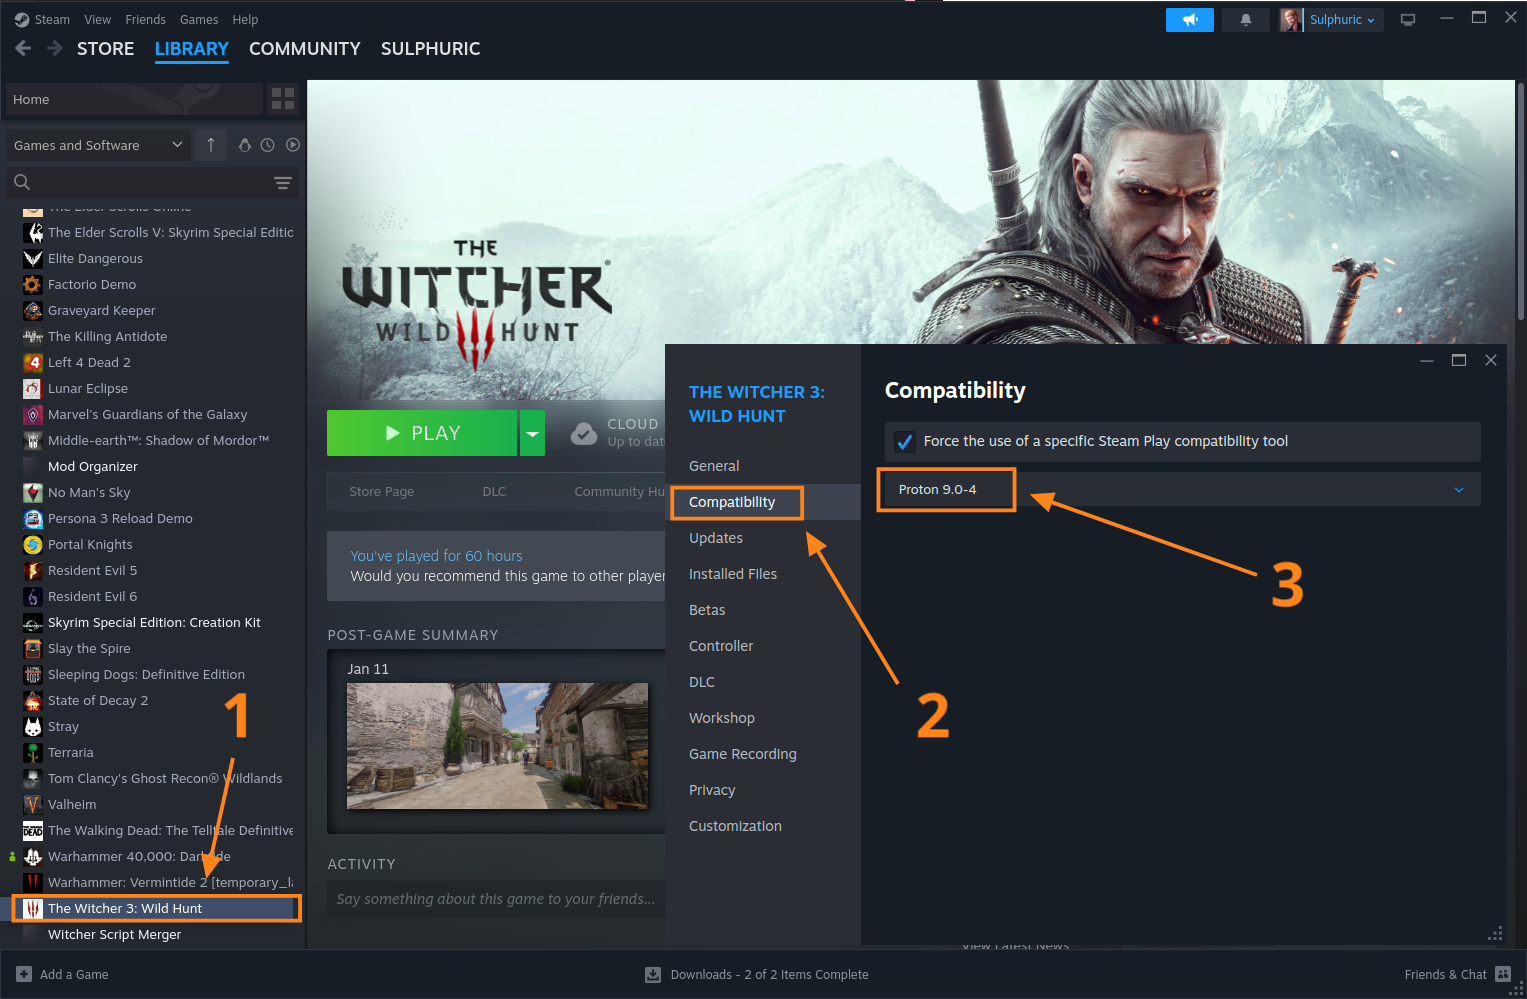
Once installed, right click the Steam button at the upper left of the client. Scroll down to the compatibility tab in the window that opens and ensure that a default compatiblity tool has been set from the dropdown menu. I would recommend selecting Proton Experimental.
I've gone ahead and have annotated each step where appropriate in the screenshots. You can click on the screenshot if you want to zoom in a little.
Next, right click the game in your library and select properties. Head to the compatability tab in the new window that appears.
You might need to select a different Proton version depending on your Linux distro, but in my case Proton Experimental worked fine.
If you do not know which version you need then just choose Proton Experimental. If you ecounter any issues with the game then try Proton 9.0-4 or Proton 8.0-5.
You might need to wait a few momements for Steam do download the required files when switching Proton versions. Just be patient.
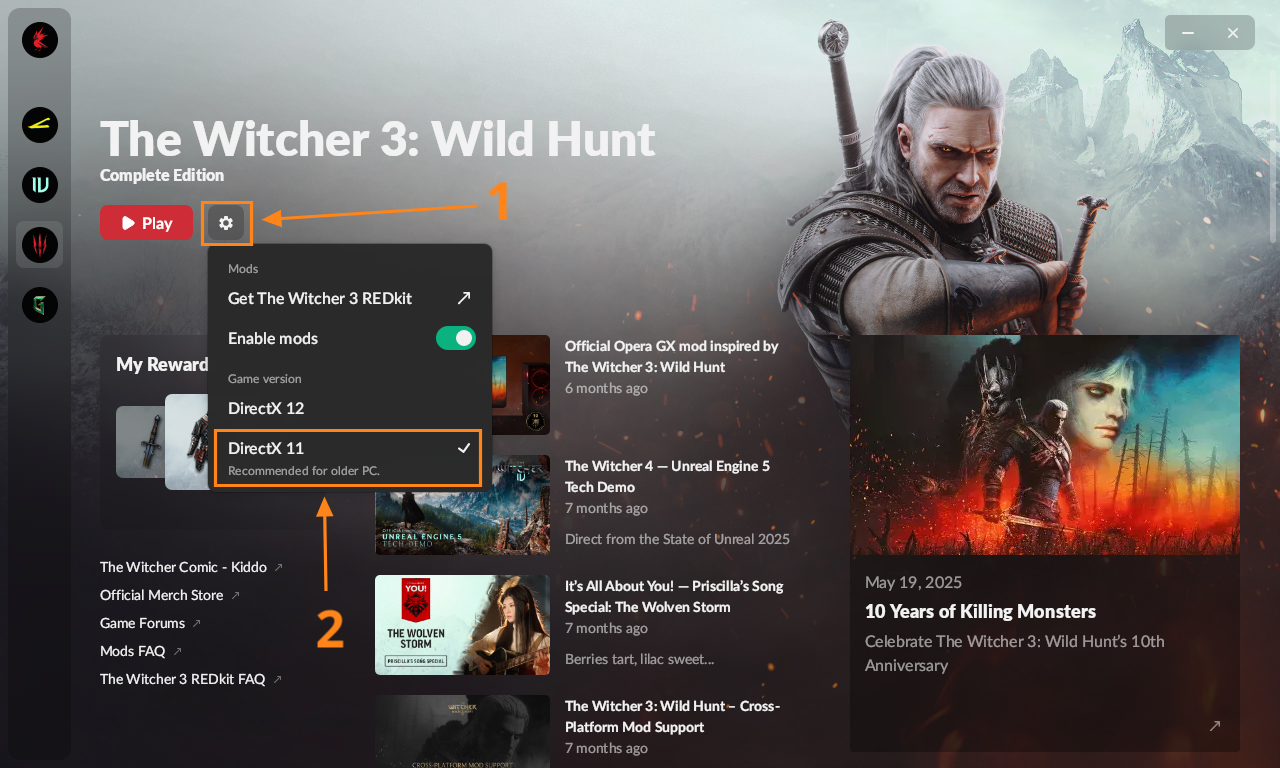
Now click play and wait for the game launcher to open. Select the gear icon in the launcher ad choose either DX11 or DX12.
Which one you choose is up to you. Just keep in mind that this game was originally built on DX11, so if you want performance then this is what you'd choose. However DX12 adds raytracing, DLSS, and FSR support, but will be more taxing on your system.
I have a medium-high end system but I find the game runs poorly on DX12, at least via Proton. So I have chosen DX11. You can always try DX12 and then swap over to DX11 if the performance isn't great. In fact, go ahead and give it a test now.
Installing Mods
Almost every mod in my mod list can be found on Nexus Mods. This is currently the largest platform for sharing and downloading mods.
If you are following my mod list then you should start with the HD Reworked Project followed by Tweaks. This is because the HD Reworked Project must overwrite several vanilla game files, and Tweaks must overwrite some of these files too.
Because of this, I will teach you how to install both of these mods.
-
The Witcher 3 HD Reworked Project Next-Gen
Reworks many of the game textures and assets to increase resolution and detail, and adds additional physics effects. -
Tweaks
Provides additional graphical presets and options beyond those in the base game. This includes a supreme preset and an ultimate preset.
Both of these mods are incredible and I'd highly recommend them for any modded playthrough of The Witcher 3 as they drastically increase the visual fideility of the game.
So how do you actually download them? Either use the links above or search for them on the Nexus Mods website. Once you are on the relevant mod page, head to the files tab and download the main file. Do this for both mods.
If the mod author has struggled to make it clear what their mod does or how it should be installed, it is worth trying the posts tab to see if another user was able to provide any additional information.
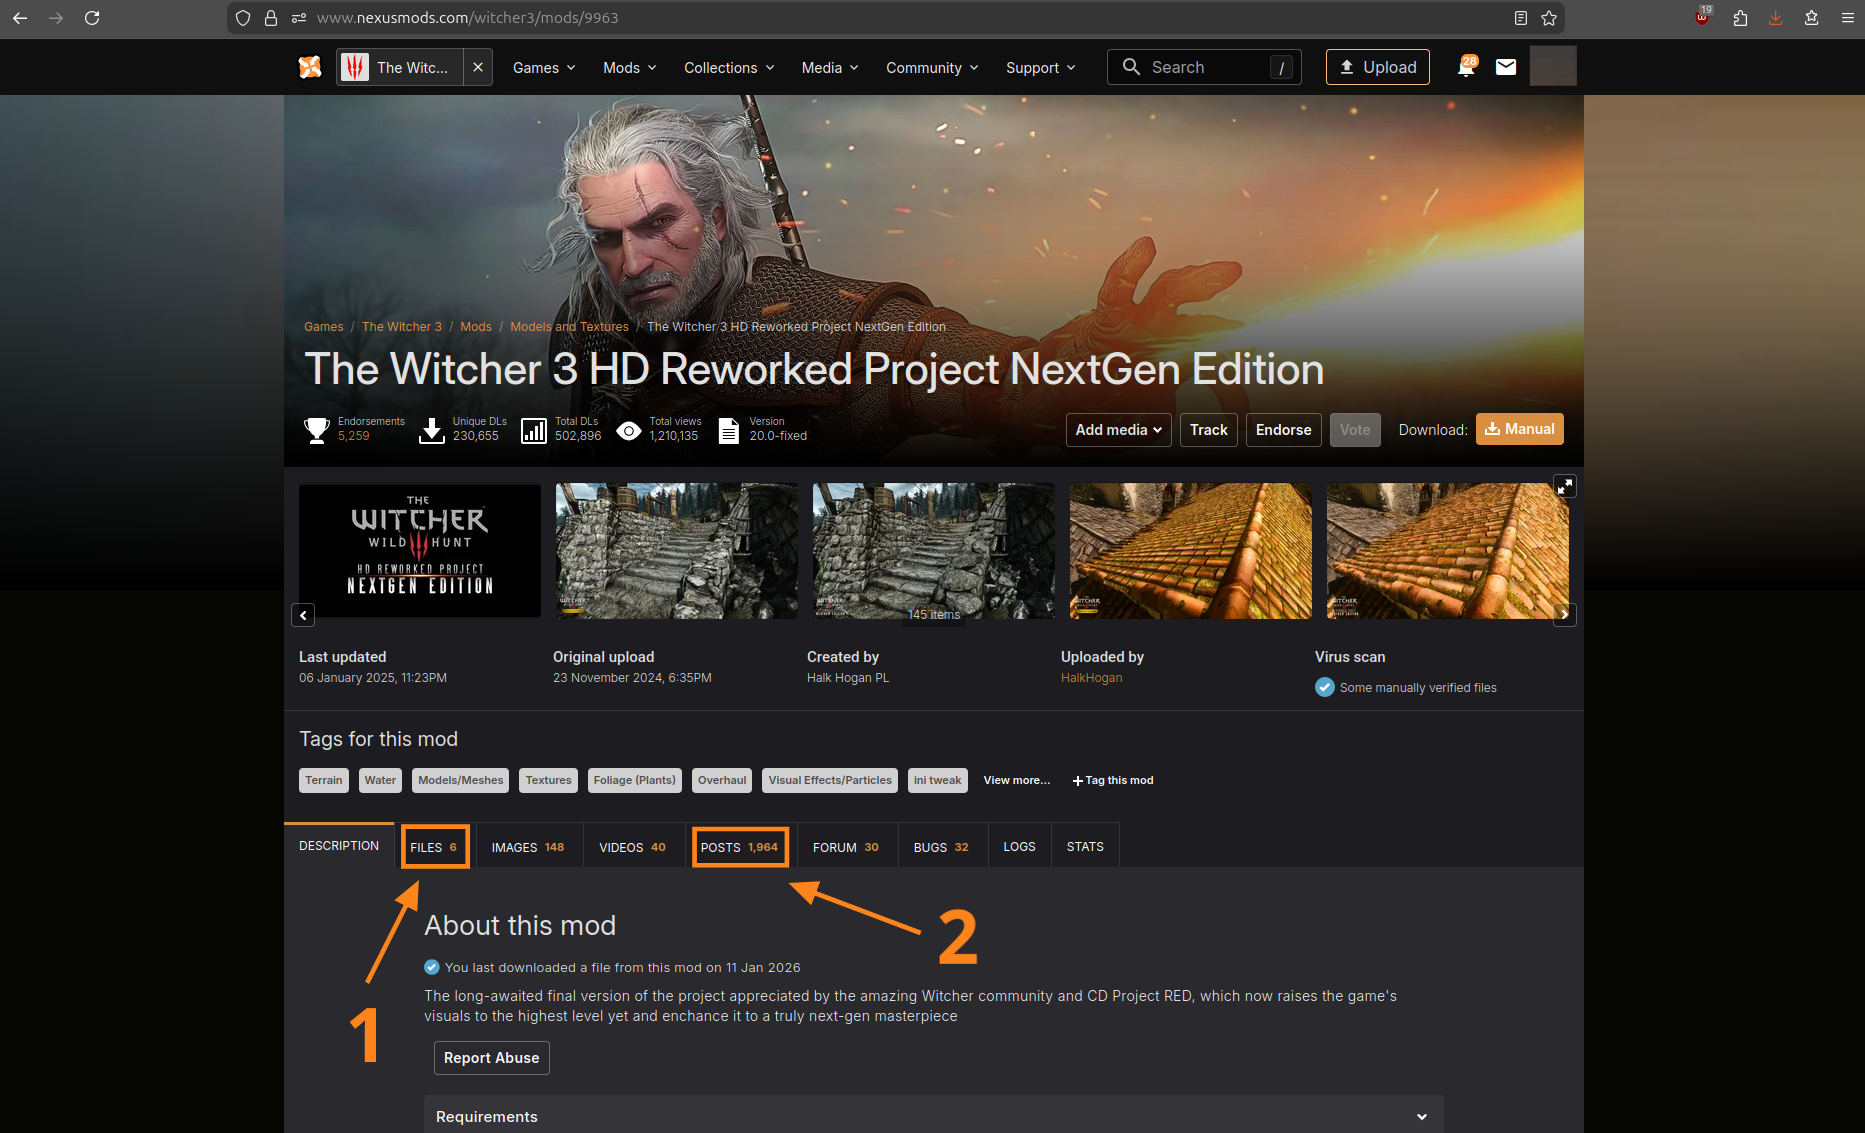
We will start with The HD Reworked Project. It is a large mod so expect it to take a while to download. If you have a Nexus Premium subscription then the download time will be cut in half.
Once the download is complete, extract the file and locate the bin and mods folders inside. Simpley drag and drop these into your game directory.
It will ask whether to merge or skip conflicting files. Check the 'apply this action to all files and folders' first and then click merge. If it wants you to overwrite any other files then select yes.

Once that is complete, extract the Tweaks file and perform the same actions. Locate the bin and mods folder inside, and simply drag and drop them into the game directory. Merge any conflicting files and allow it to overwrite anything else it needs to.
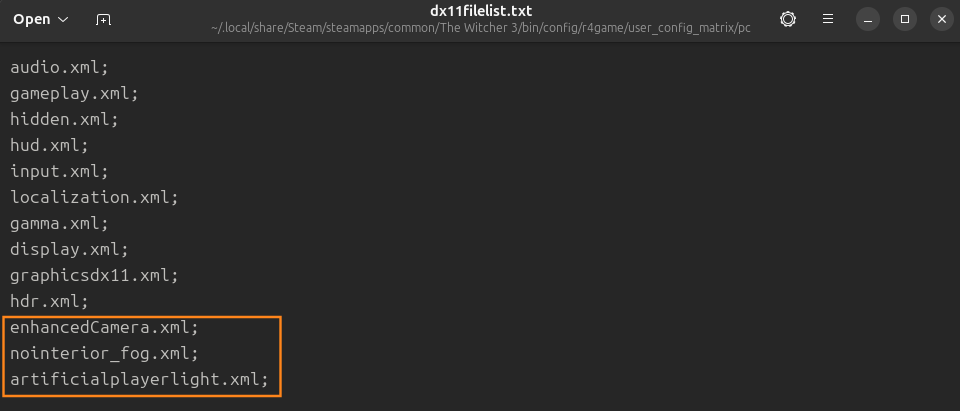
Installing mods with XML files
The following mods in my mod list requires you to install an XML file. They are very easy to install, you just need to know where to put them:
From your game folder, head to this directory:
The Witcher 3/bin/config/r4game/user_config_matrix/pc
Drag and drop the .xml files in there. Now open the following two files in the same directory in a text editor of your choice:
- dx11filelist.txt
- dx12filelist.txt
Create new lines at the bottom and type in the exact names of the .xml files you added. It is important to end each line with a semicolon. Once done, save the text files and close them.
Mod Priority
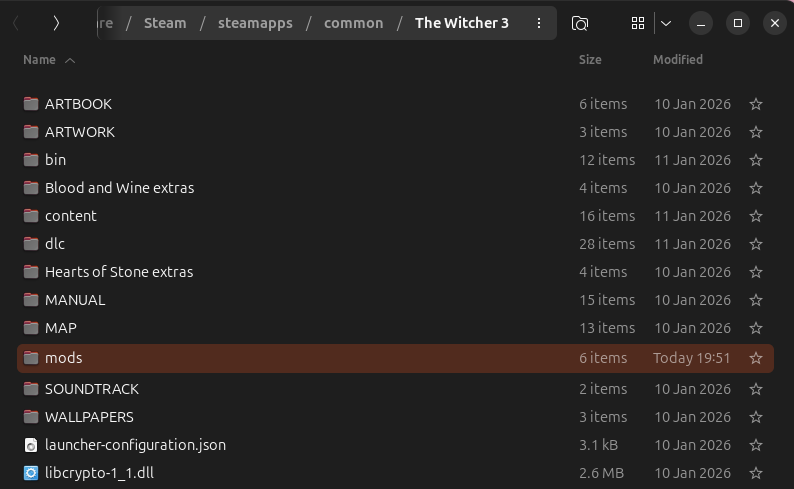
If you do not yet have a mods folder then create one in the game directory.
If you are not sure where to find your game directory, go to your library in the Steam client, right click the game and select manage > browse local files.
On Ubuntu my game is located at:
/home/sulphuric/.local/share/Steam/steamapps/common/The Witcher 3
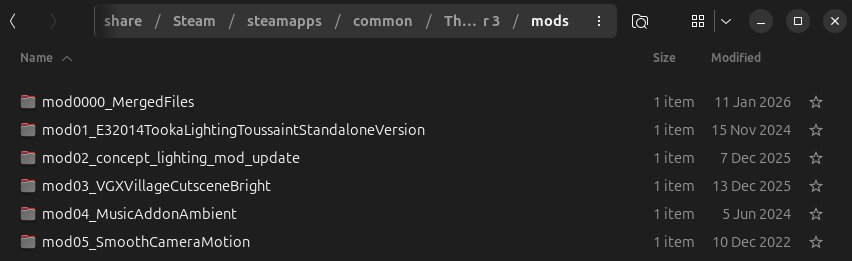
You can give mods the correct priority by simply prepending the file names with mod01, and mod02, and so on.
A mod with a file name of mod01 will take precedence over a mod with a name of mod02. In other words, you can say that mod01 has a higher priority.
Mods with a higher priority will overwrite those with a lower priority in the case of conflicts. So if you want mods to 'win' then simply give them a higher priority.
The file name mod00 is reserved for the file generated by Script Merger. The name specifically is called mod0000_MergedFiles. It is best to not change this name.
Some mods also require files that must be dropped in the dlc folder. I personally recommend prepending these mod files with mod50 onward to ensure they are organized under the vanilla dlc folders. Note that mod priority also matters here.

Script Merger
The Script Merger tool attempts to resolve script conflicts within a mod list. This use of this tool is important to prevent potential crashes and the infinite loading screen bug.
This tool should be used last after installing all your mods. If you change or update your mod list then you should probably run the tool again unless you are sure it's unecessary.
Installing Script Merger
Download the main file from Nexus Mods here.
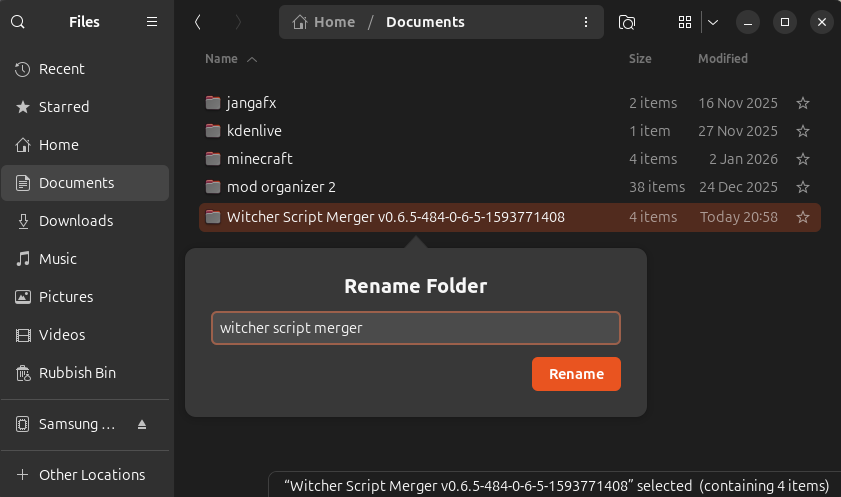
Once downloaded, extract and move the files to somewhere safe on your system where you won't lose them.
I moved the folder to the documents directory on my system and renamed it to 'witcher script merger'.
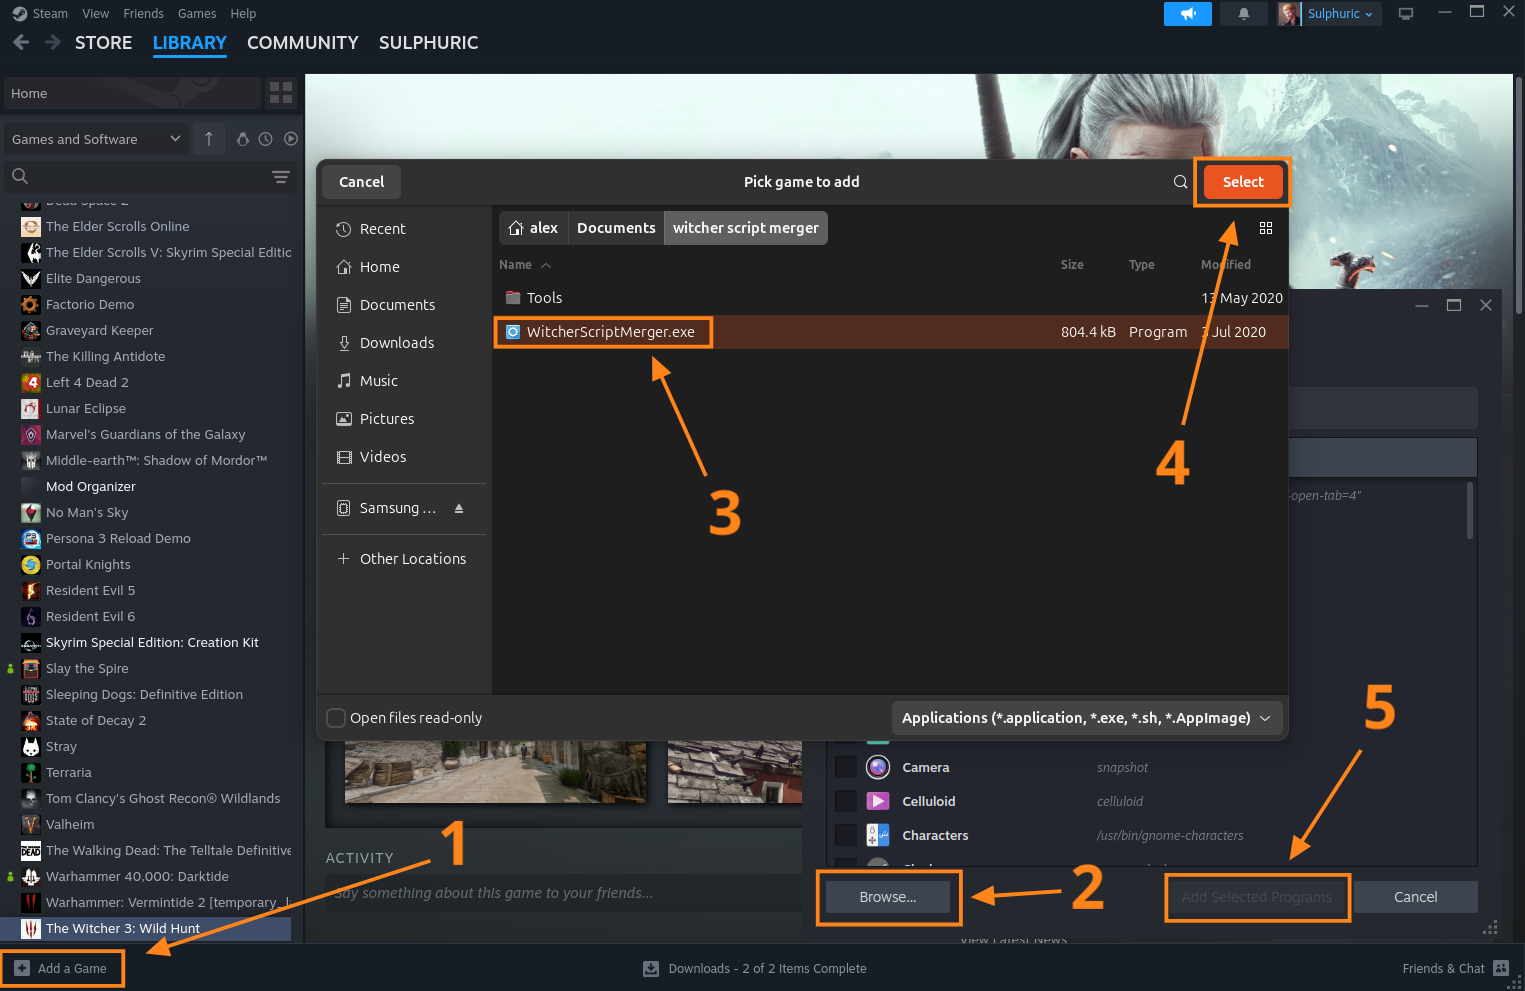
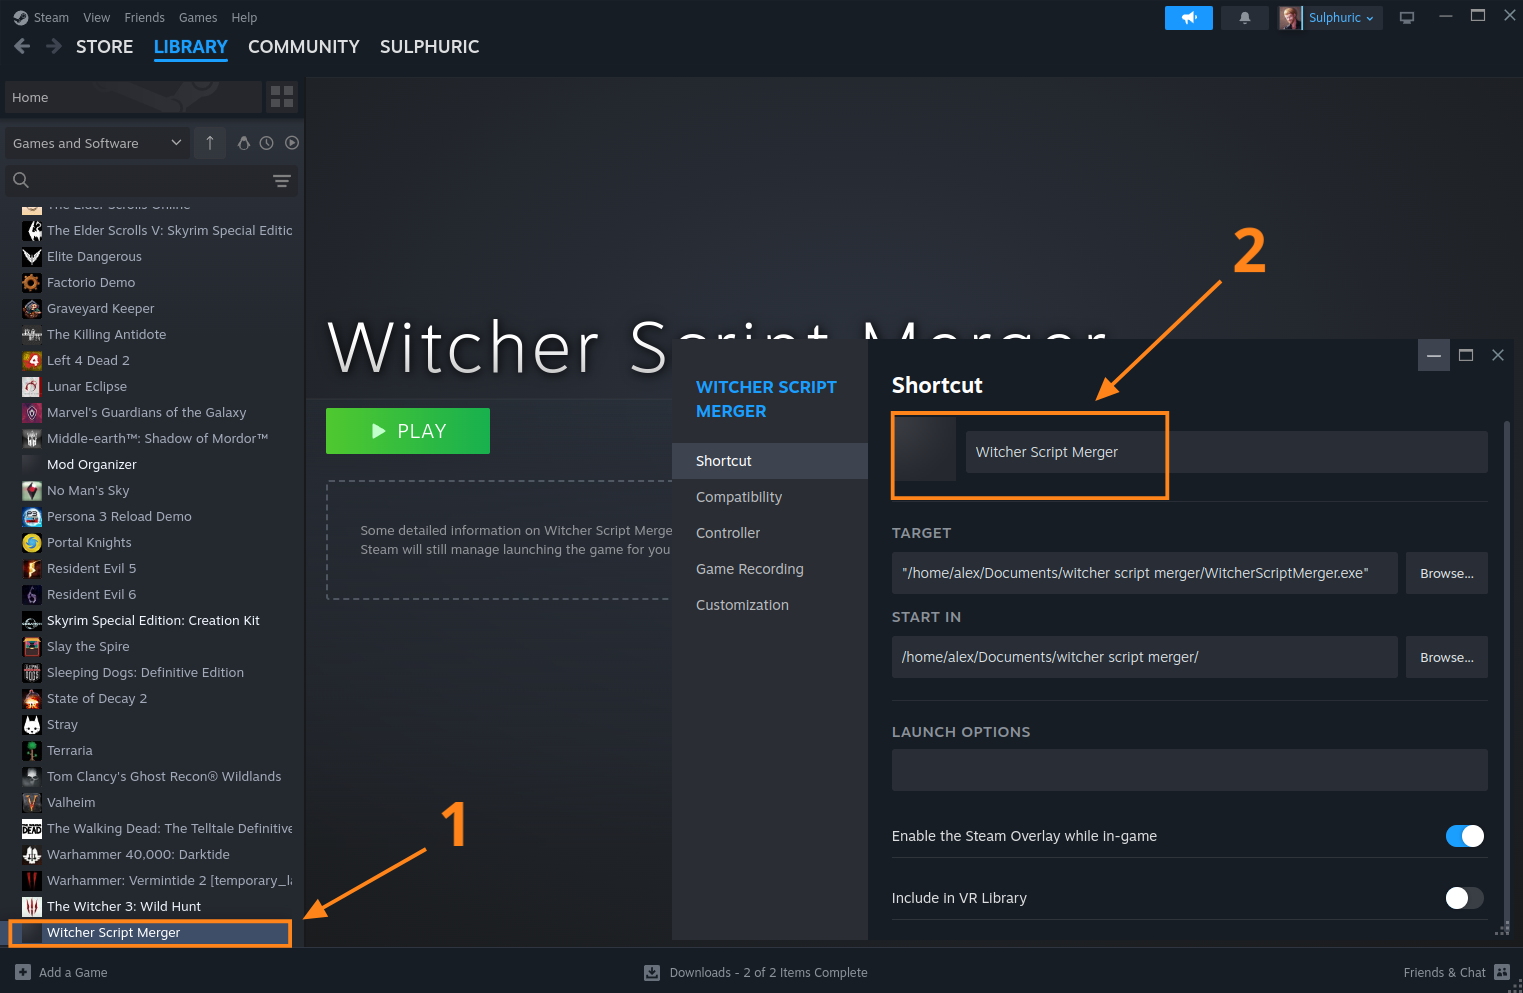
Head back to your Steam library and in the lower left corner select add a game > add a non-steam game.
Select browse in the new window that opens and locate the WitcherScriptMerger.exe file you just saved on your system, Select it and then click the 'add selected programs' button once it turns blue.
Script Merger should now appear in your Steam library. Right click it, select properties, and head to the compatibility tab in the new window that appears.
Enable 'Force the use of a specific Steam Play Compatibility Tool' and select Proton 9.0-4 from the drop down menu. From my testing Script Merger will not work with Proton Experimental.
Close out of this window once done and launch it via Steam.
Using Script Merger
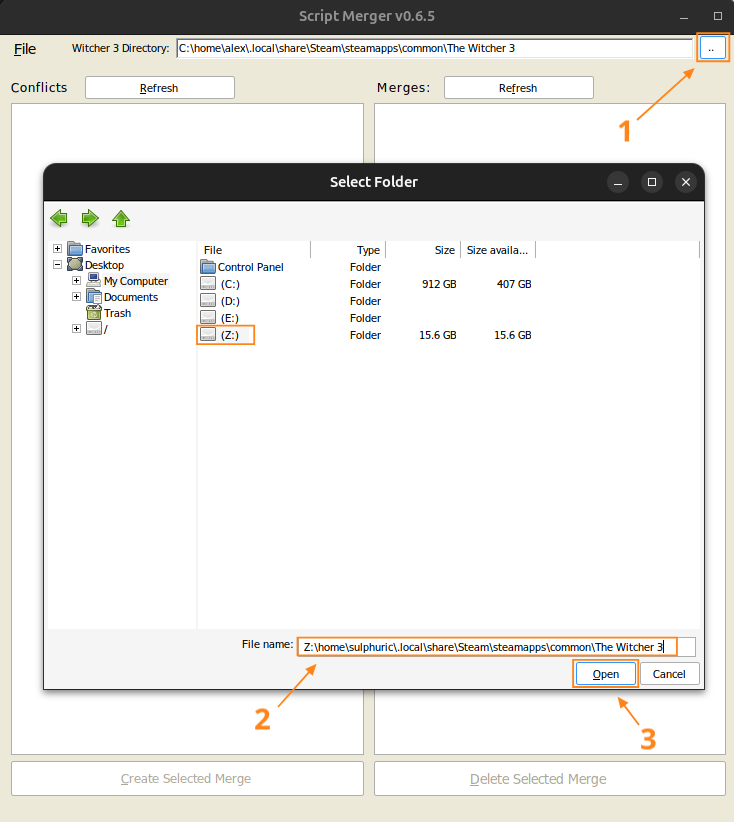
After launching Script Merger You will need to provide it with the game directory. However, the game directroy will not show inside Proton.
The easiest workaround for this is to right click the game in your Steam library, select manage > browse local files. Copy the directory from the top of your file explorer.
Now perform the following steps. I will use my directory as an example.
-
Paste the directory into a text editor
/home/sulphuric/.local/share/Steam/steamapps/common/The Witcher 3 -
Flip the slashes
\home\sulphuric\.local\share\Steam\steamapps\common\The Witcher 3 -
Prepend 'Z:'
Z:\home\sulphuric\.local\share\Steam\steamapps\common\The Witcher 3
The reason for flipping the slashes is because Proton is emulating a Window file explorer. Windows uses black slashes instead of forward slashes like Linux.
The reason for prepending 'Z:' is because (Z:) is the drive Proton uses for your actual Linux files. This is also where your game is located (but is hidden).
Now click the three dots in the upper right of Script Merger and paste the directory we constructed from step three and select open.
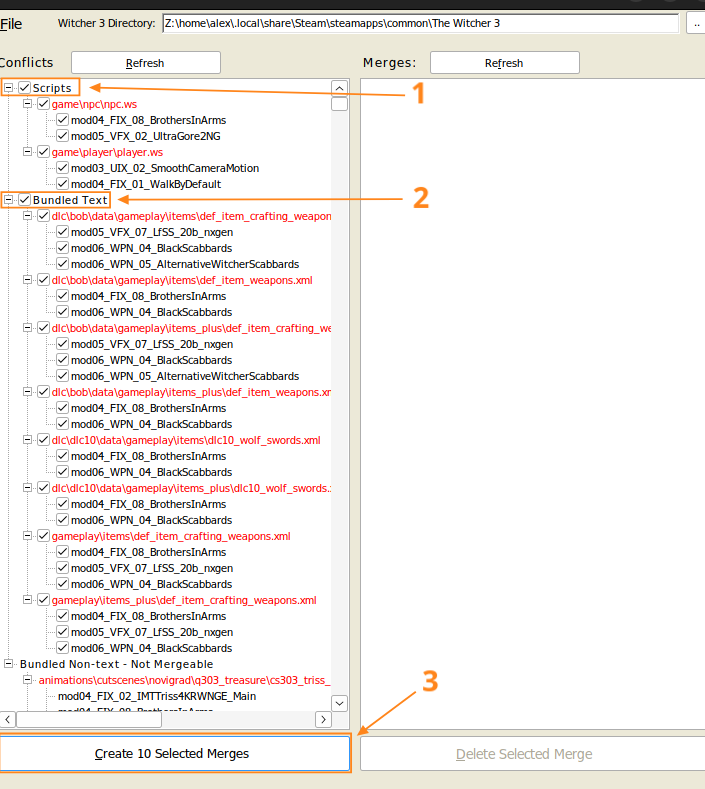
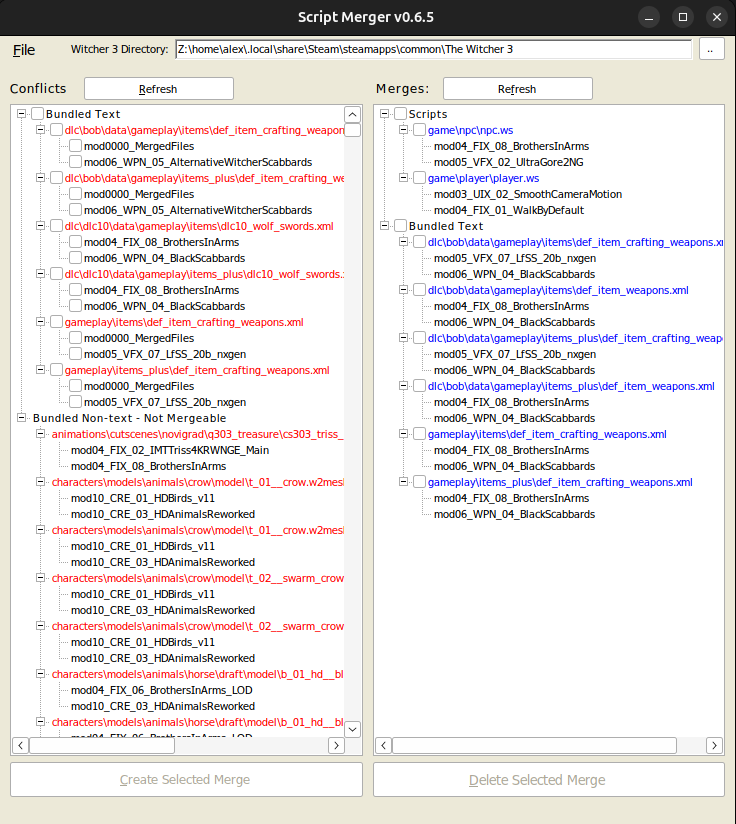
Once that is done you should see a loading bar on Script Merger as it attempts to detect conflicts in your mod list.
Now, you may or may not end up with a bunch of mod files listed on the left hand side. If it is clear then you don't need to do anything, simply click close and move on.
If there are items on the left hand side, then mark the upper checkbox for scripts and bundled text, and click the create selected merges button at the bottom.
Items listed under 'bundled non-text - not mergeable' can safely be ignored.
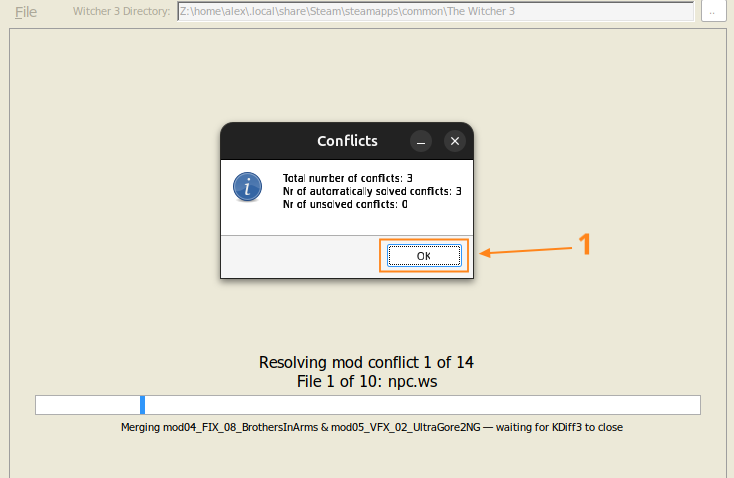
Each resolved conflict will open a window prompting you to acknowledge it. Just click ok for each one.
It will also open a merged finished window. Simply click continue. If you want you can uncheck the 'show this report after each merge' box if you want to skip it.
Eventually you will come across a more complex window asking you to manually resolve conflicts. If you understand what needs to be done then you can attempt to resolve this. However, for my mod list I am going skip this to keep things simple. I've not had any issues from doing this, so I think it is okay.
To skip this window, just close out of it and select quit without saving. Repeat this for each one that opens.
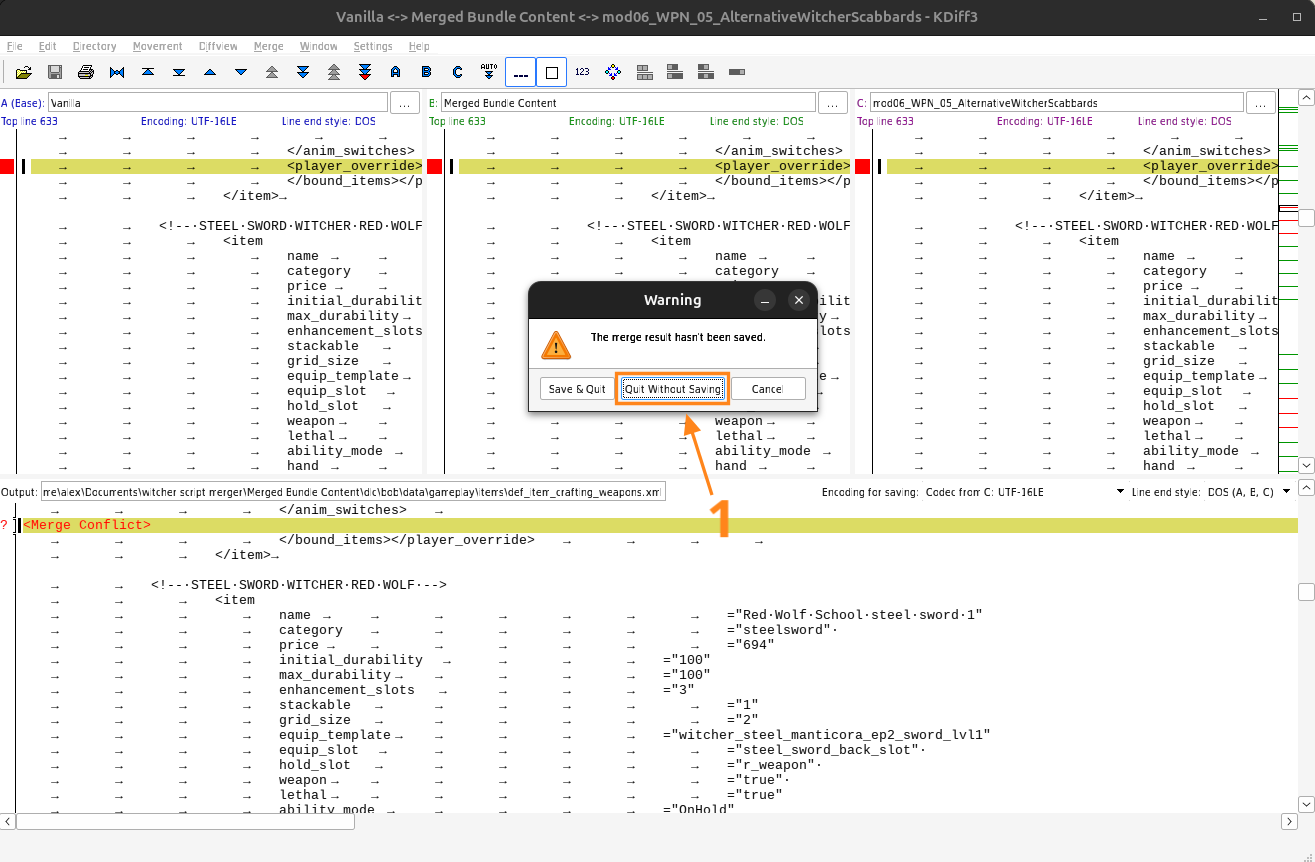
If anything else pops up just read the message and respond appropriately. Most of the time it is just a case of clicking yes, ok, and confirm.
Once it is finished it will show the follow window stating is has packed a new bundle file. Click ok and let Script Merger return to it's main screen.
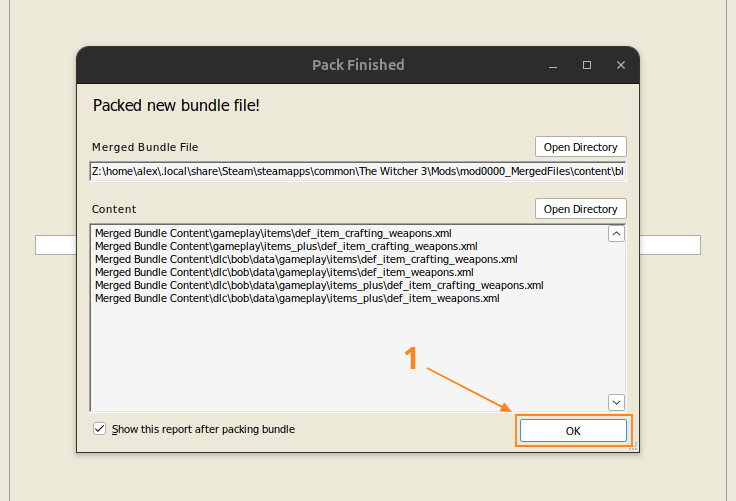
Once complete you should have a file called "mod0000_MergedFiles" at the top of your mods folder and your Script Merger should have the resolved conflicts listed on the right hand side in blue.
Once complete you should have a file called mod0000_MergedFiles at the top of your mods folder, and Script Merger should have the resolved conflicts listed on the right hand side in blue.
You can now close Script Merger. However if you ever update your mod list then it is usually required to run this tool again just like we described.
Now that is pretty much it! You've successfully modded The Witcher 3. This may have seemed long winded, but once you've installed a couple of mods and become familiar with the process it is fairly quick.
Since you've set up Script Merger via Steam you don't need to do any additional work, you can simply click launch after you've updated your mod list and create any merges.

The Mod List
Now you have the knowledge required to sucessfully mod your game, you might be interested in my personal mod list.
This mod list focuses on graphically enhancing the game while leaving the gameplay untouched. This means if you want to play the game as the developers intended but with superior visuals, then this mod list is perfect for you.
I have also designed this mod list as a foundation to build upon and personalize. So feel free to add more mods or change certain things around if it interests you.
Note that this list is in order, in that it also represents the order in which your mods should load in the mods folder. The mod at the top of the list should have mod01 prepended to the file name, and the mod at the very end should have mod99 prepended or whatever name is most suitable.
Lastly, do make sure you read the description and requirements for each mod so you know what it is for and how you should install it. If you followed the Installing Mods section of this guide then you already dealt with the most complex mods in this list.
Also don't forget I have provided a PDF version of the mod list here!
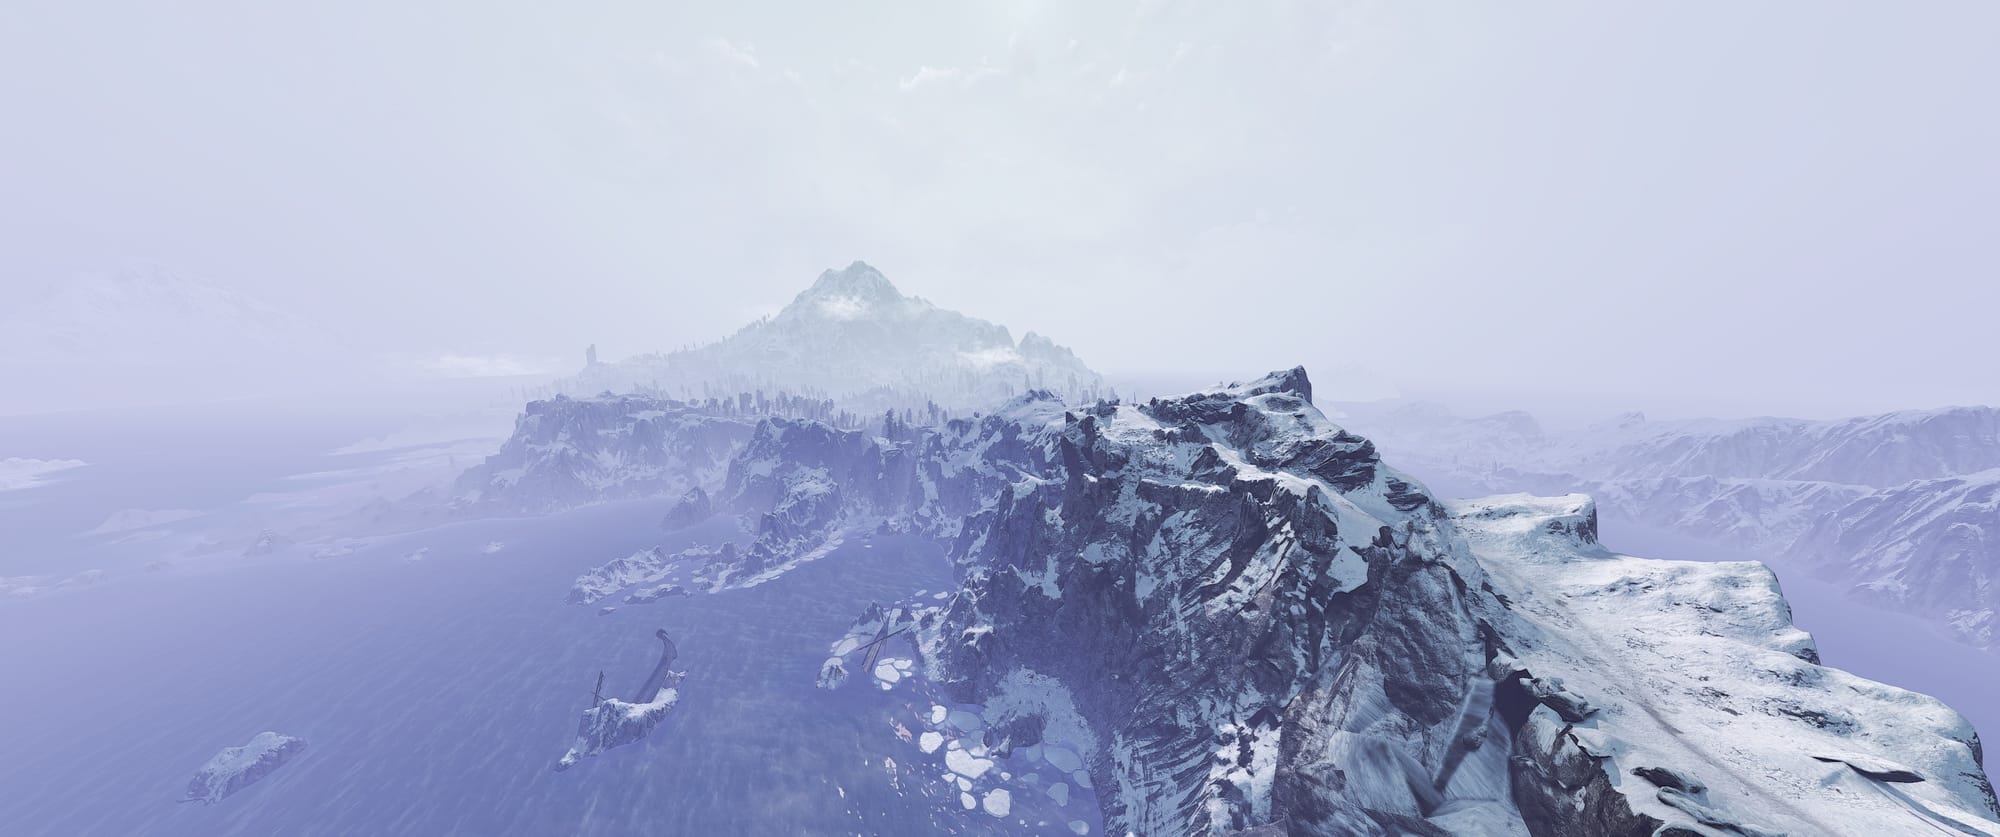
Lighting
Two lighting mods have been linked, however choose only one. There are several other lighting mods hosted on the Nexus as well.
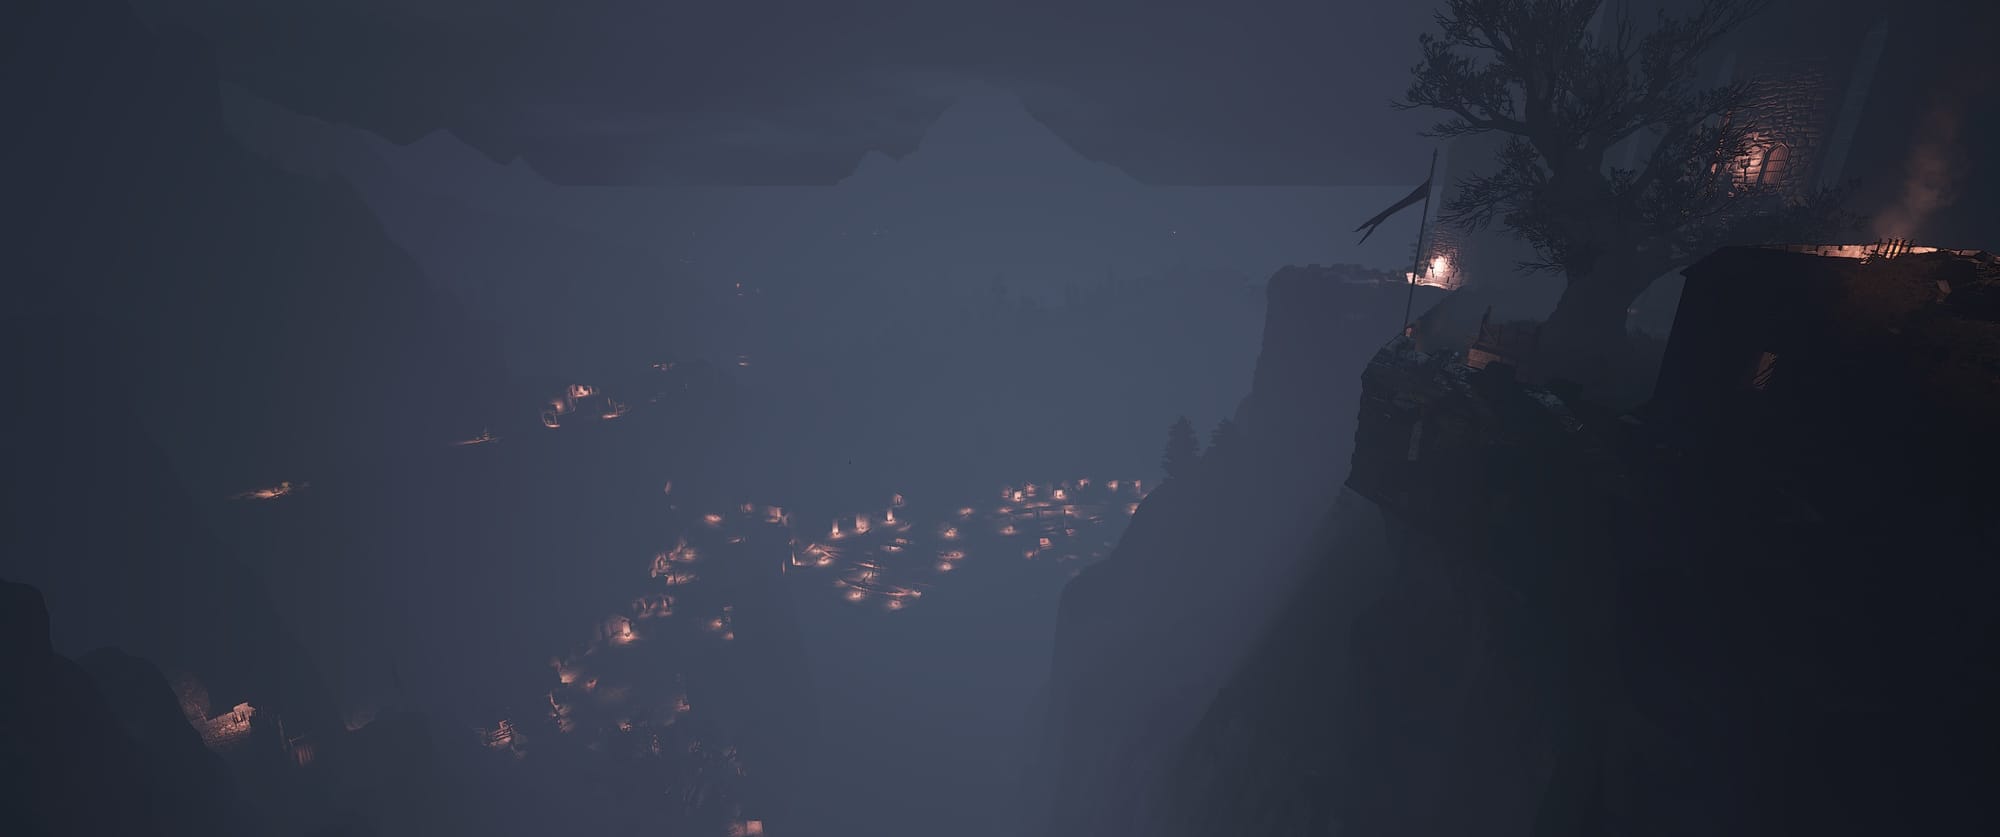
The 2013 concept lighting mod does not cover Toussaint. If choosing this one, use another lighting mod such as Standalone Toussaint by TheWhiteWolf7.
The burning village cutscene mod attempts to replicate how the cutscene looked in the game trailers. Install this mod regardless of the lighting mod chosen.
Music, Camera & UI
Music
Camera & UI
- Enhanced Camera
- Smooth Camera Motion
- Ultrawide Gwent
- Smooth GUI - HD Reworked Project Patch
- Smooth GUI
Bug Fixes & Tweaks
- Walk by Default
- Tweaks
- NPC Physics 60fps Fix
- E3 Geralt Hair Physics 60fps Fix
- Brothers in Arms LOD Bundle
- Brothers in Arms Optional Add-on
- Brothers in Arms
- Community Patch - Shared Imports
- Disable Interior Fog
- No Artificial Player Light
Visual Effects
- Blood Trails
- Ultra Gore 2 Next Gen [often dismember]
- Pesky Sword Trails Begone [except projectiles]
- Improved Sign Effects
- No More Glowing
- No or Permanent Rune Glow Effect [no rune and no oil effect]
- Lore Friendly Silver Swords [2.0b for next-gen]
- No Dirty Lense Effect
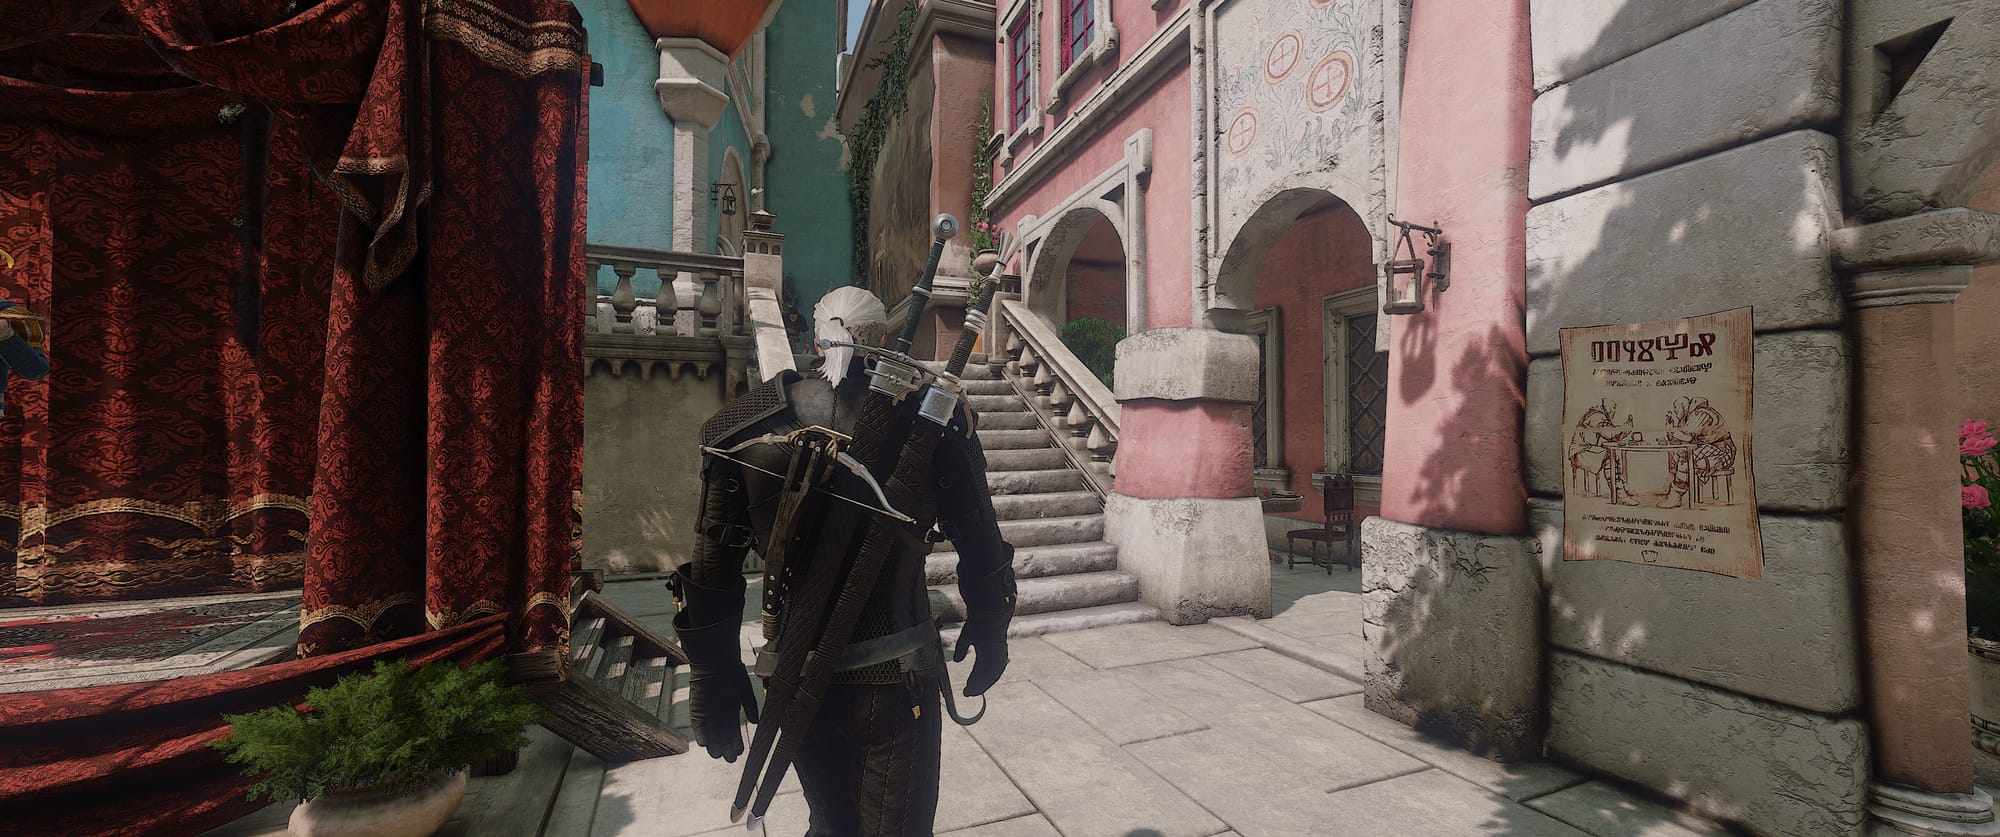
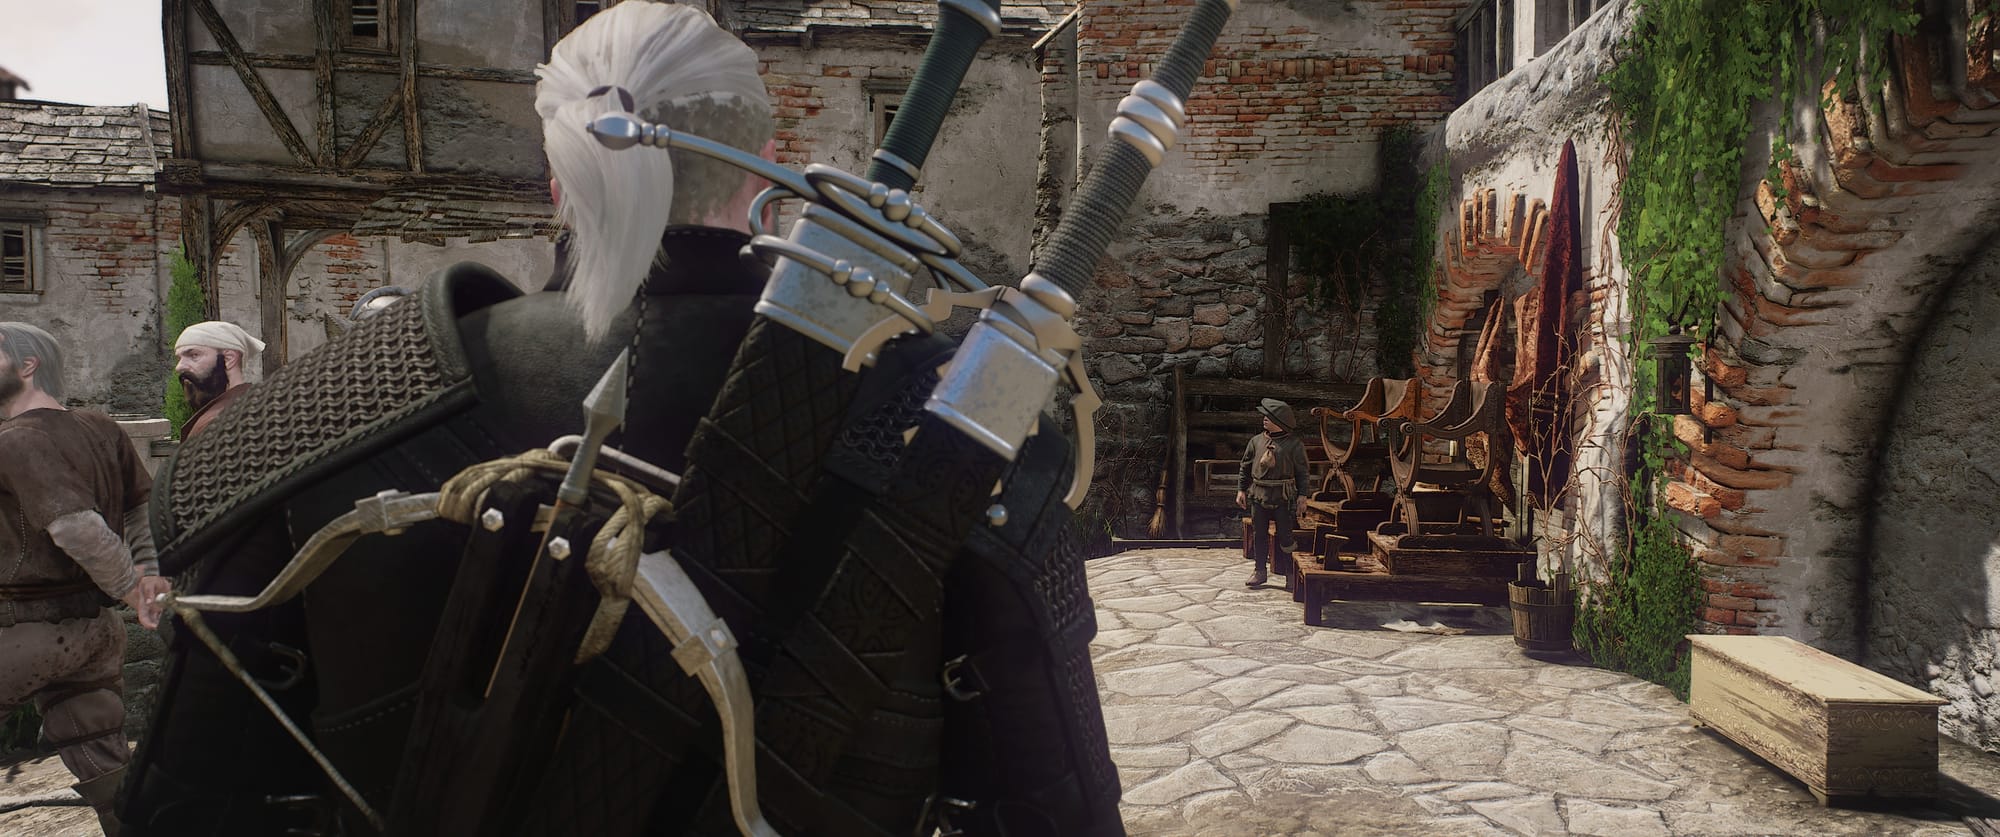
Weapons
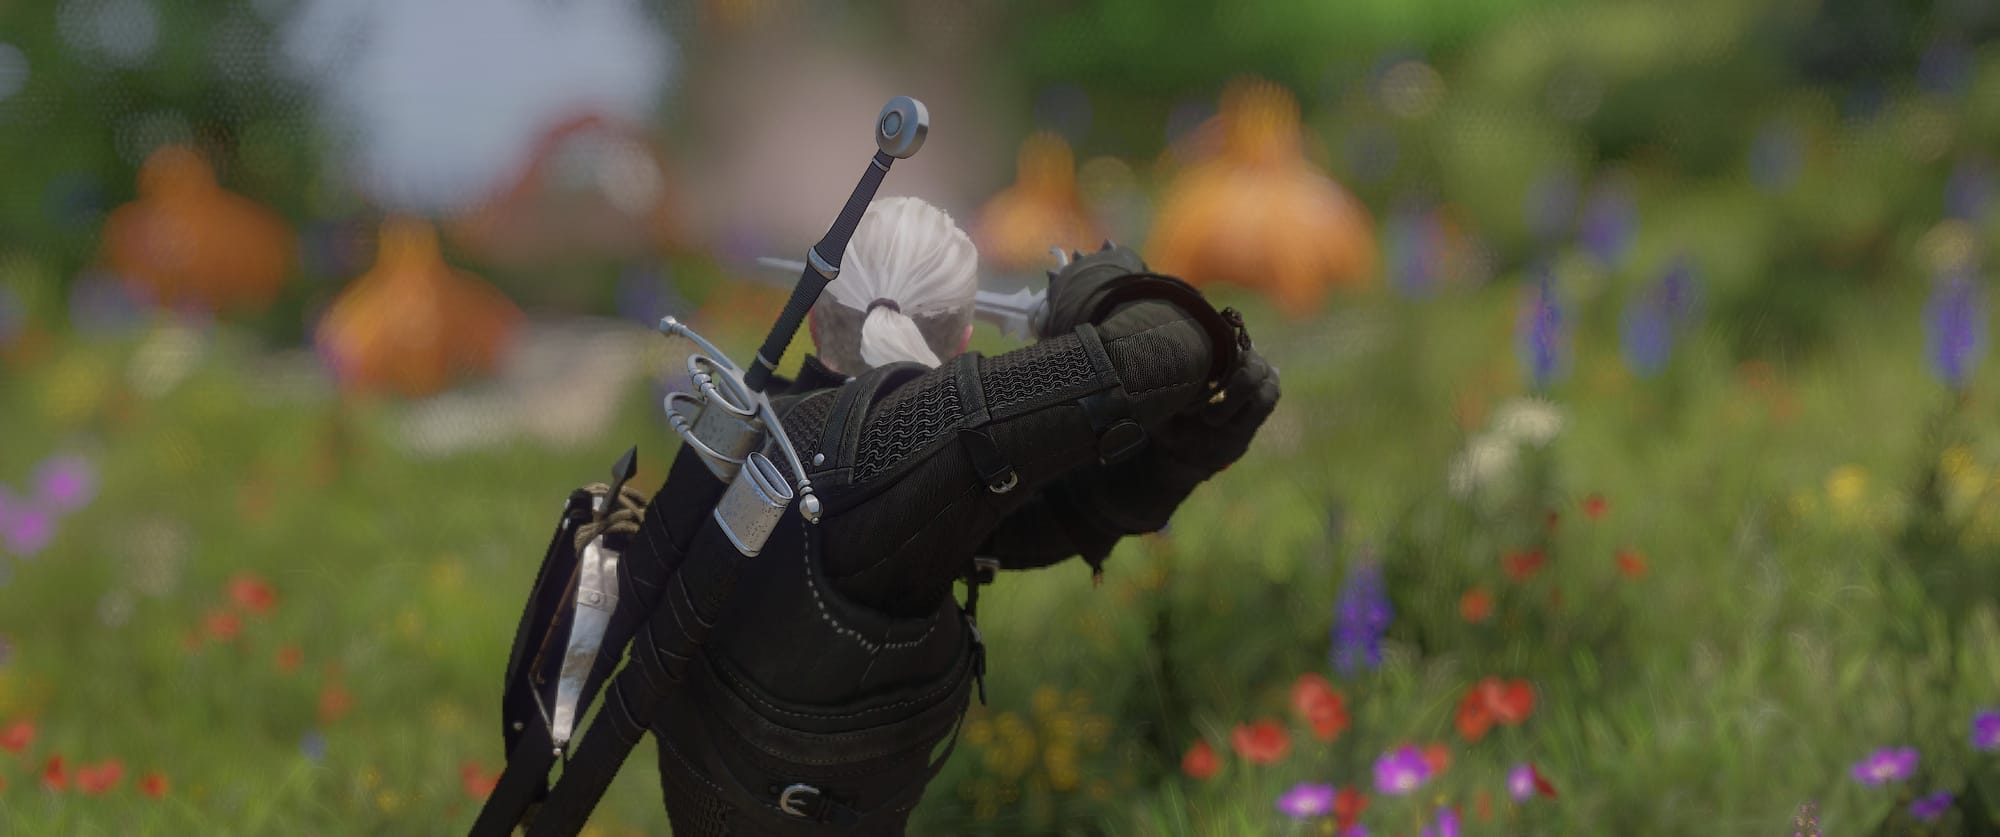
- E3 Runes 4K
- Swap Crossbow Appearances [mod swap robust crossbow]
- Black Scabbards Retexture
- Black Scabbards
- Alternative Witcher Scabbards
Accessories
Clothing & Armour
Clothing
- Netflix Casual Outfit Black Shirt [netflix casual darker]
- Elegant Doublets and Tunics and Black Towel [black towel]
Armour
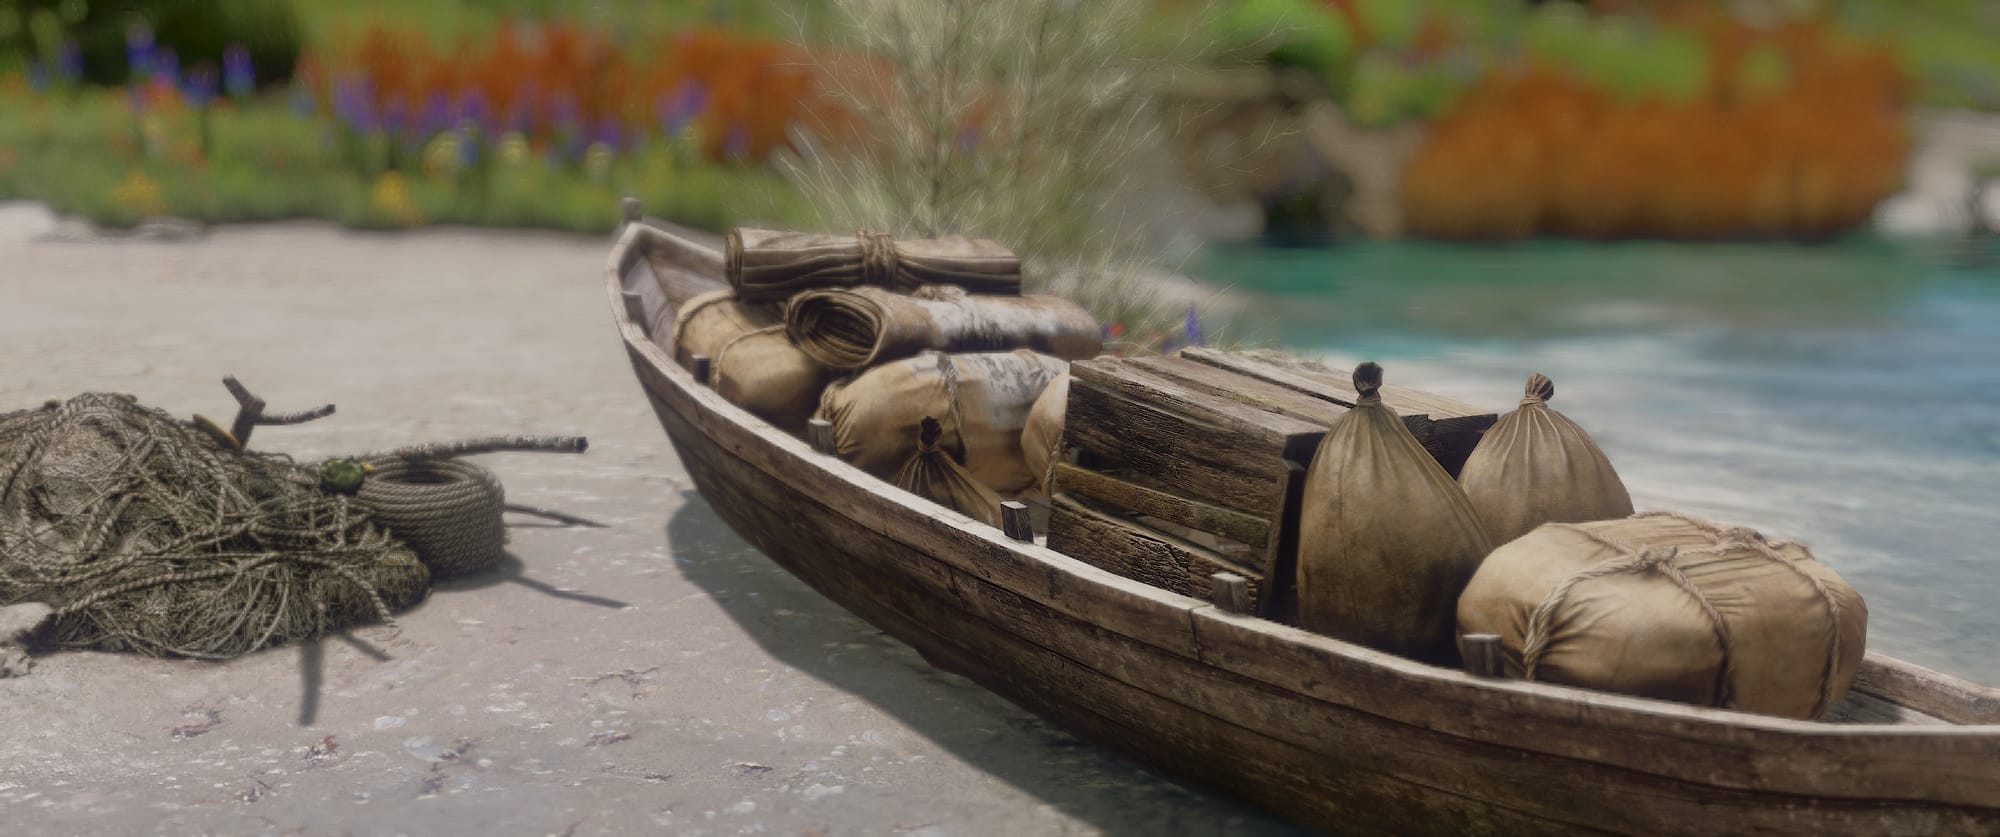
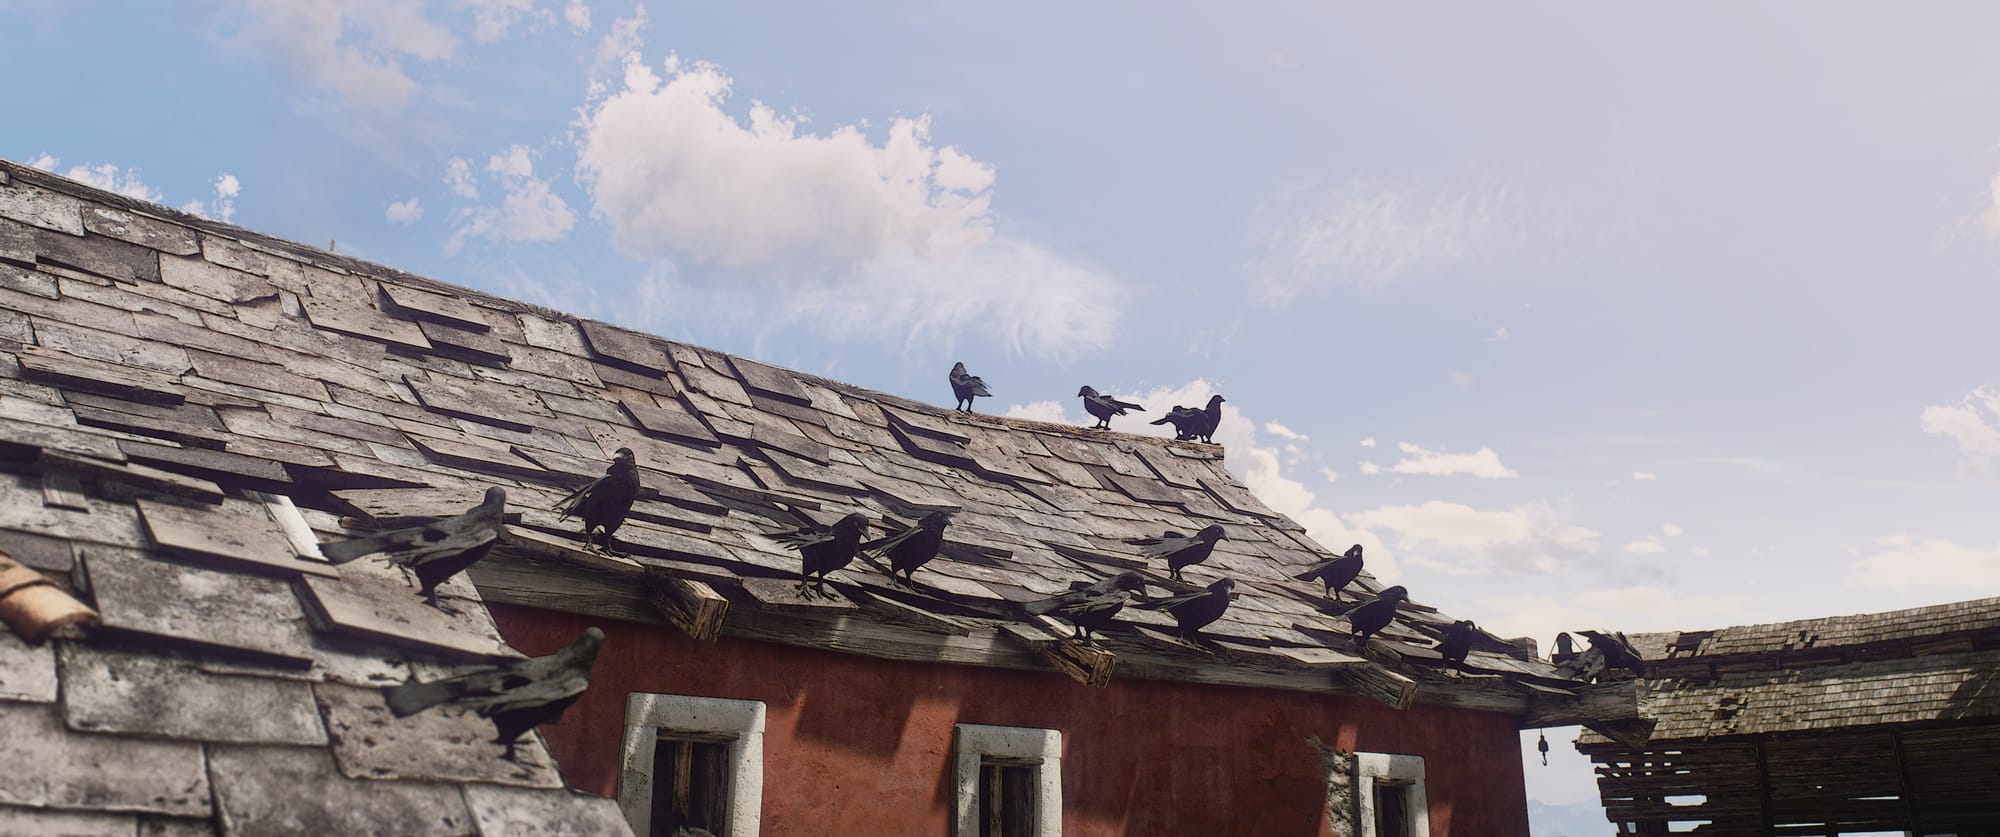
Creatures & Monsters
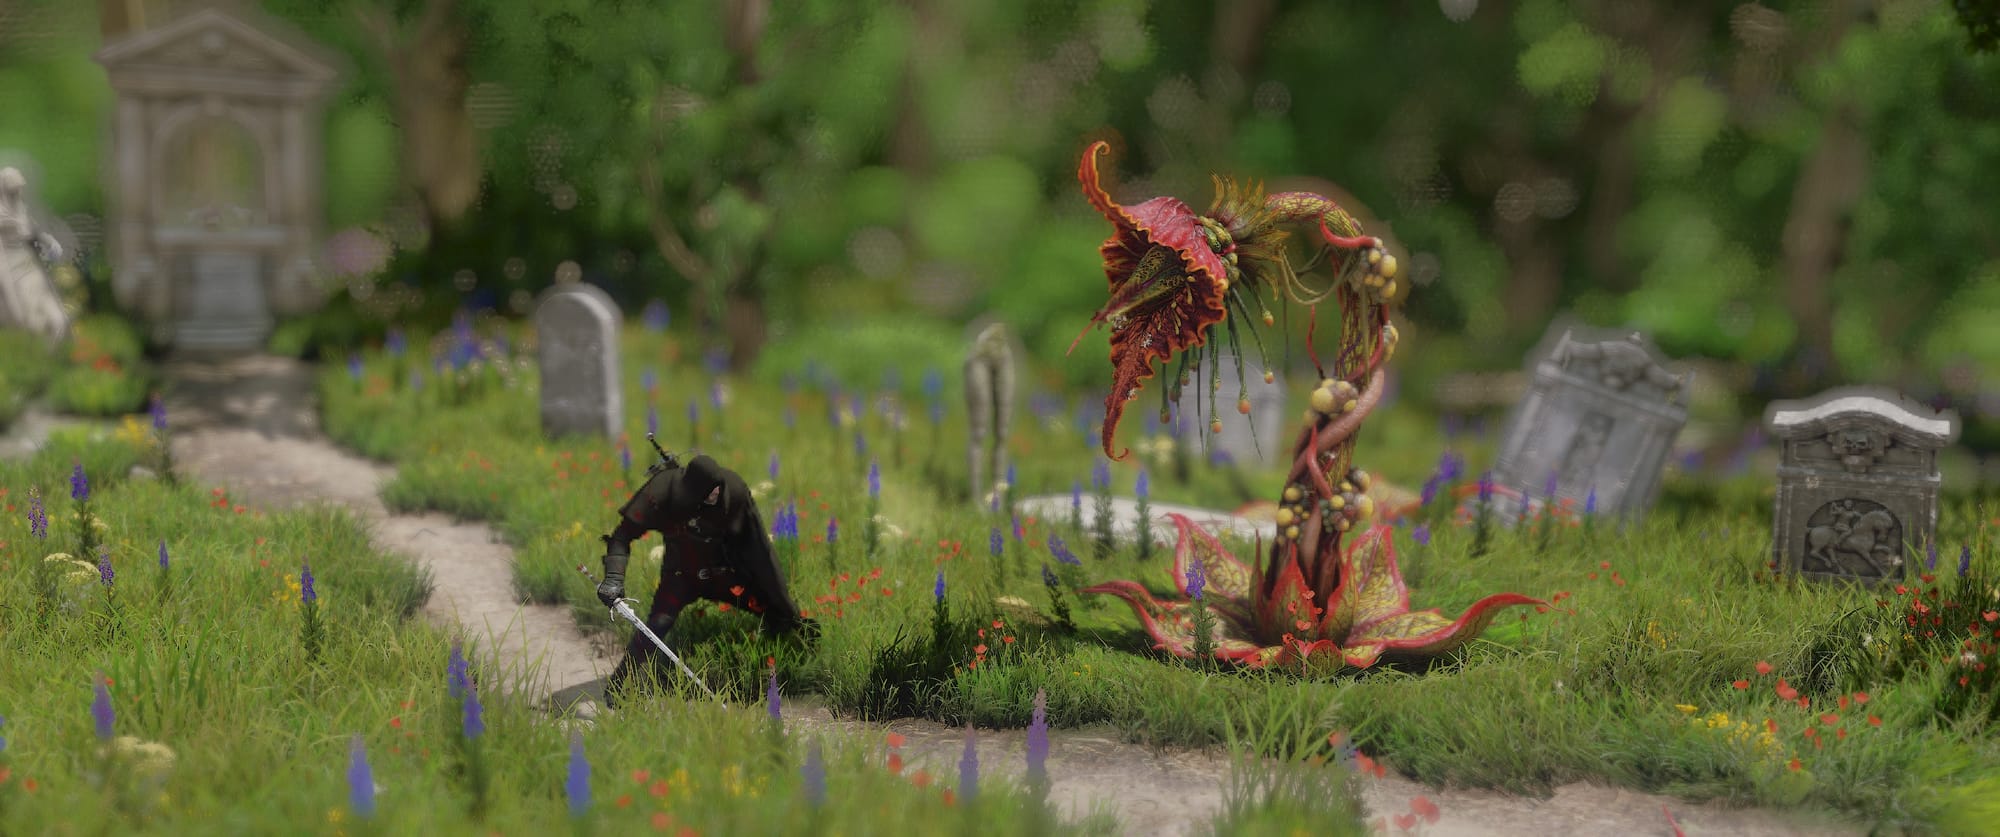
- E3 HD Birds Reworked Project
- HD Horse Accessories
- HD Animals Reworked
- HD Monsters Reworked LODs
- HD Monsters Reworked Trophies
- HD Monsters Reworked
Character & NPC Overwrites (NSFW)
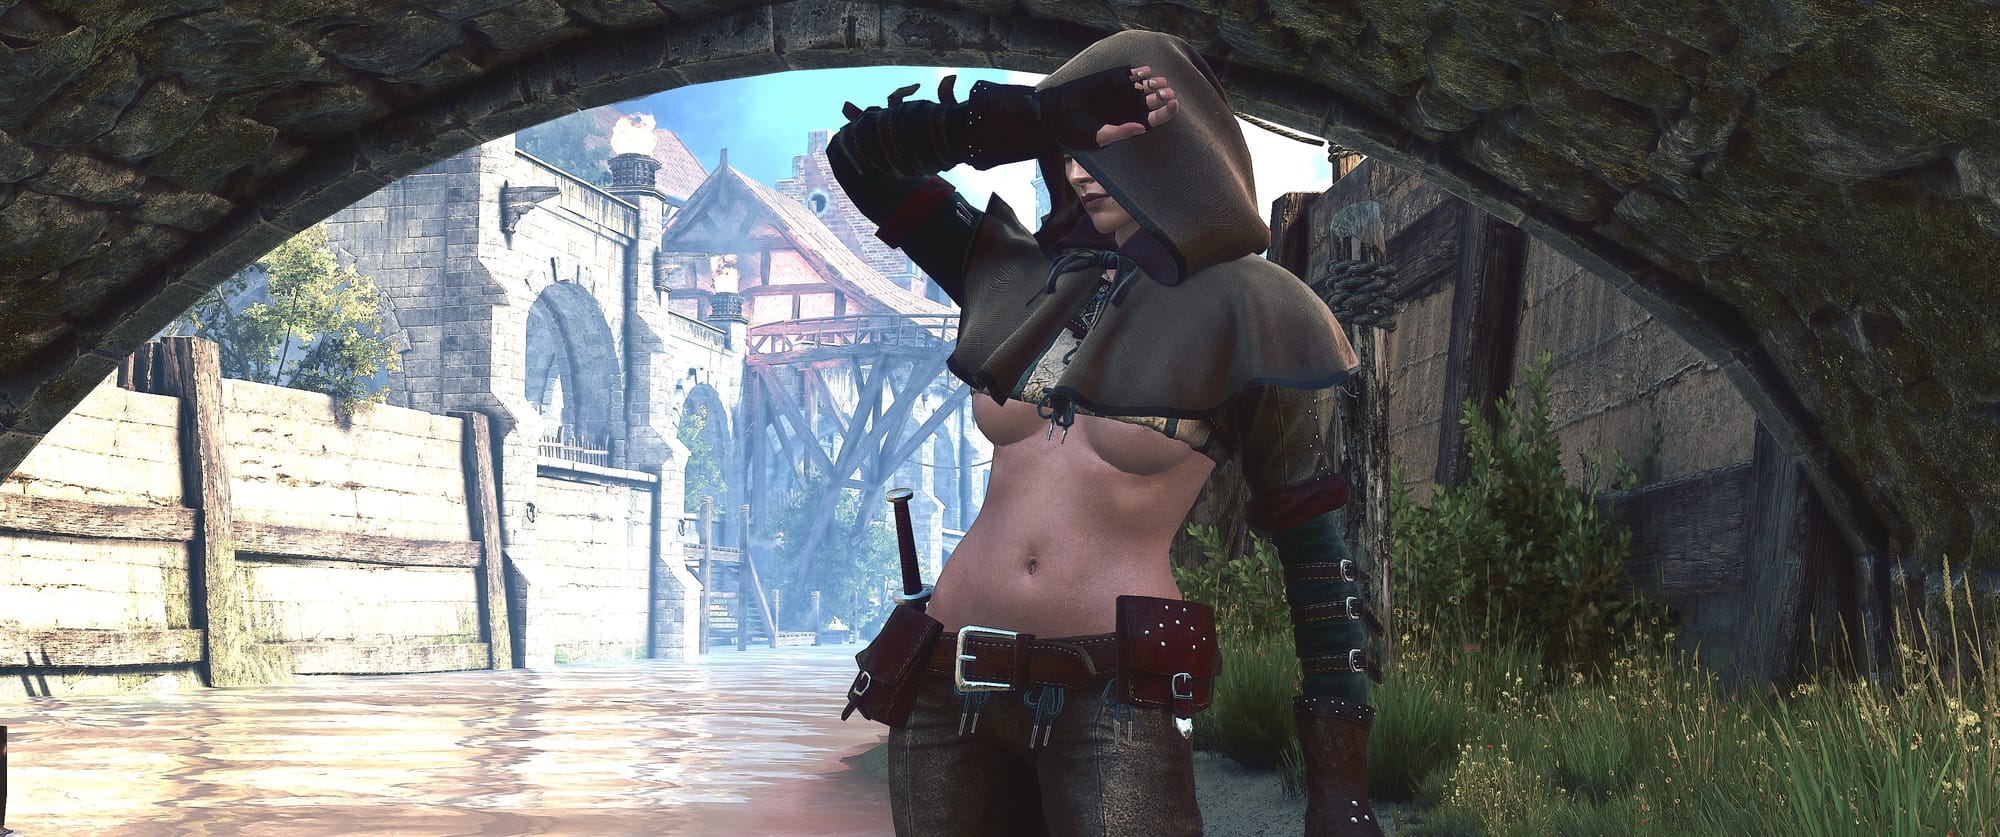
Place any specific character and NPC mods wanted here. These
may overwrite the mods in the Characters & NPCs section that
follows next. The links above are example mods for this section.
Characters & NPCs (NSFW)
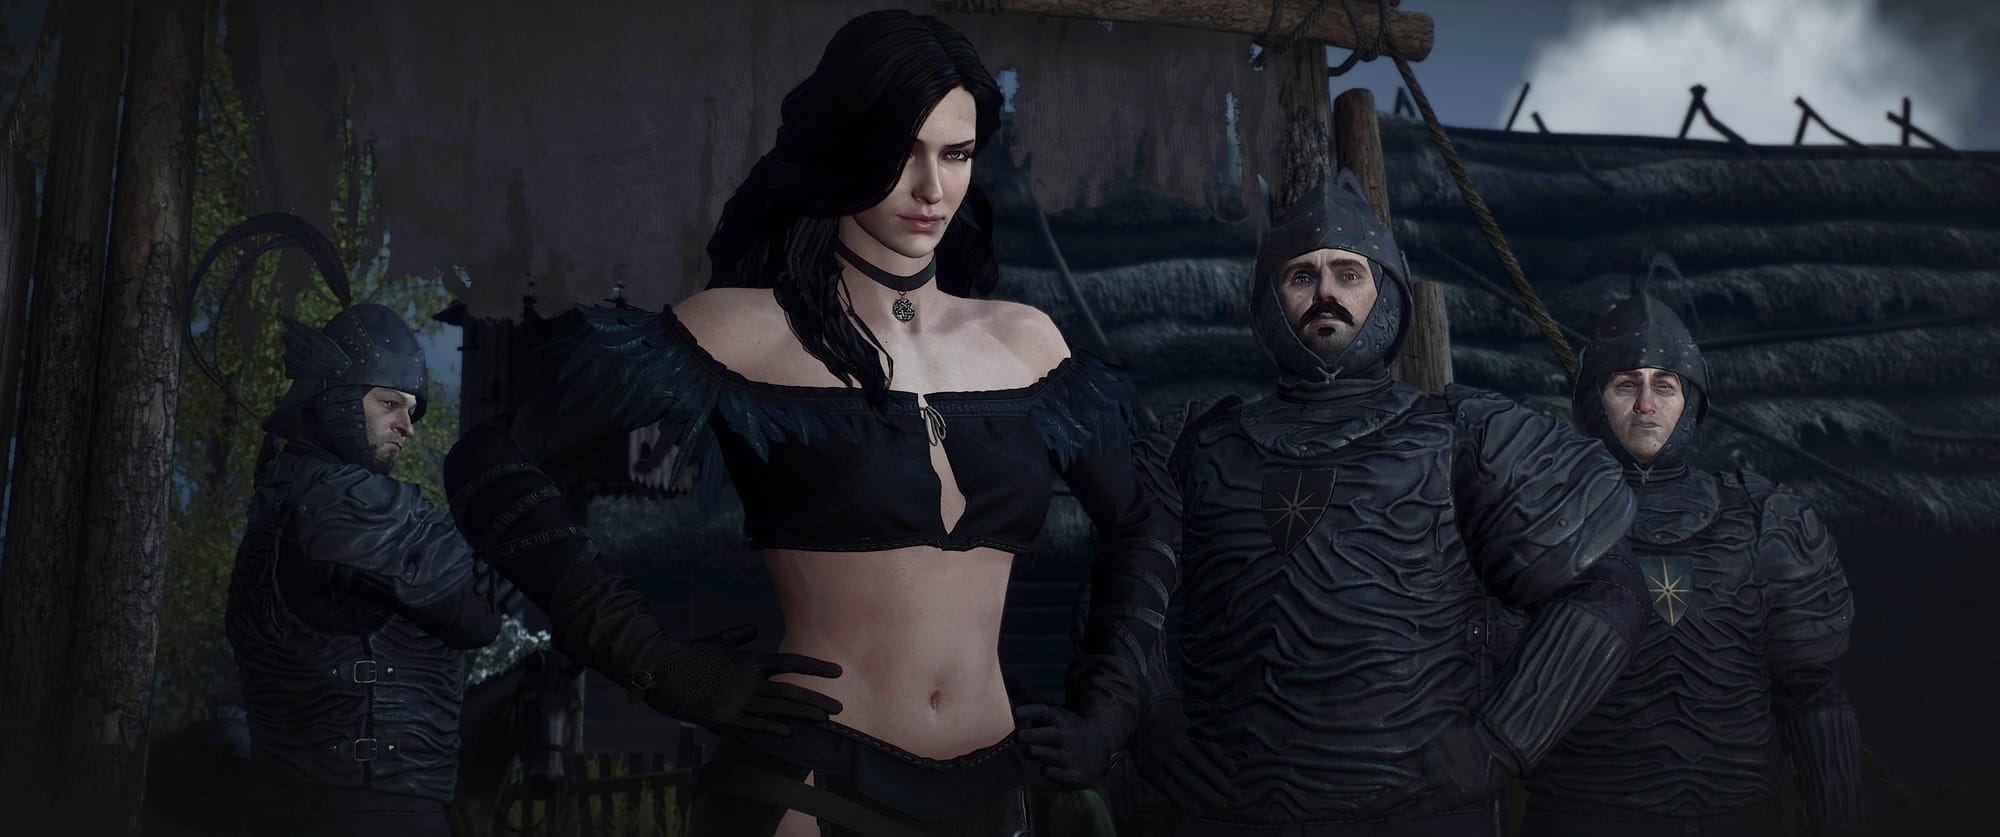
- VGX Eredin Appearance
- 4K Reworked Women - Remove Lingerie
- 4K Reworked Women - Yennefer 4K NG
- 4K Reworked Women - Triss 4K NG
- 4K Reworked Women - Cirilla 4K NG
- 4K Reworked Women - Shani 4K NG
- Glowing Witcher Eyes [yellow - very faint]
- Humans of the Continent - High Quality Geralt
- Humans of the Continent - Females Clean Faces
- Humans of the Continent - Females
- Humans of the Continent - Males
- Humans of the Continent - Children
- Better Breasts and Butts
- Unique Character Textures
Environment
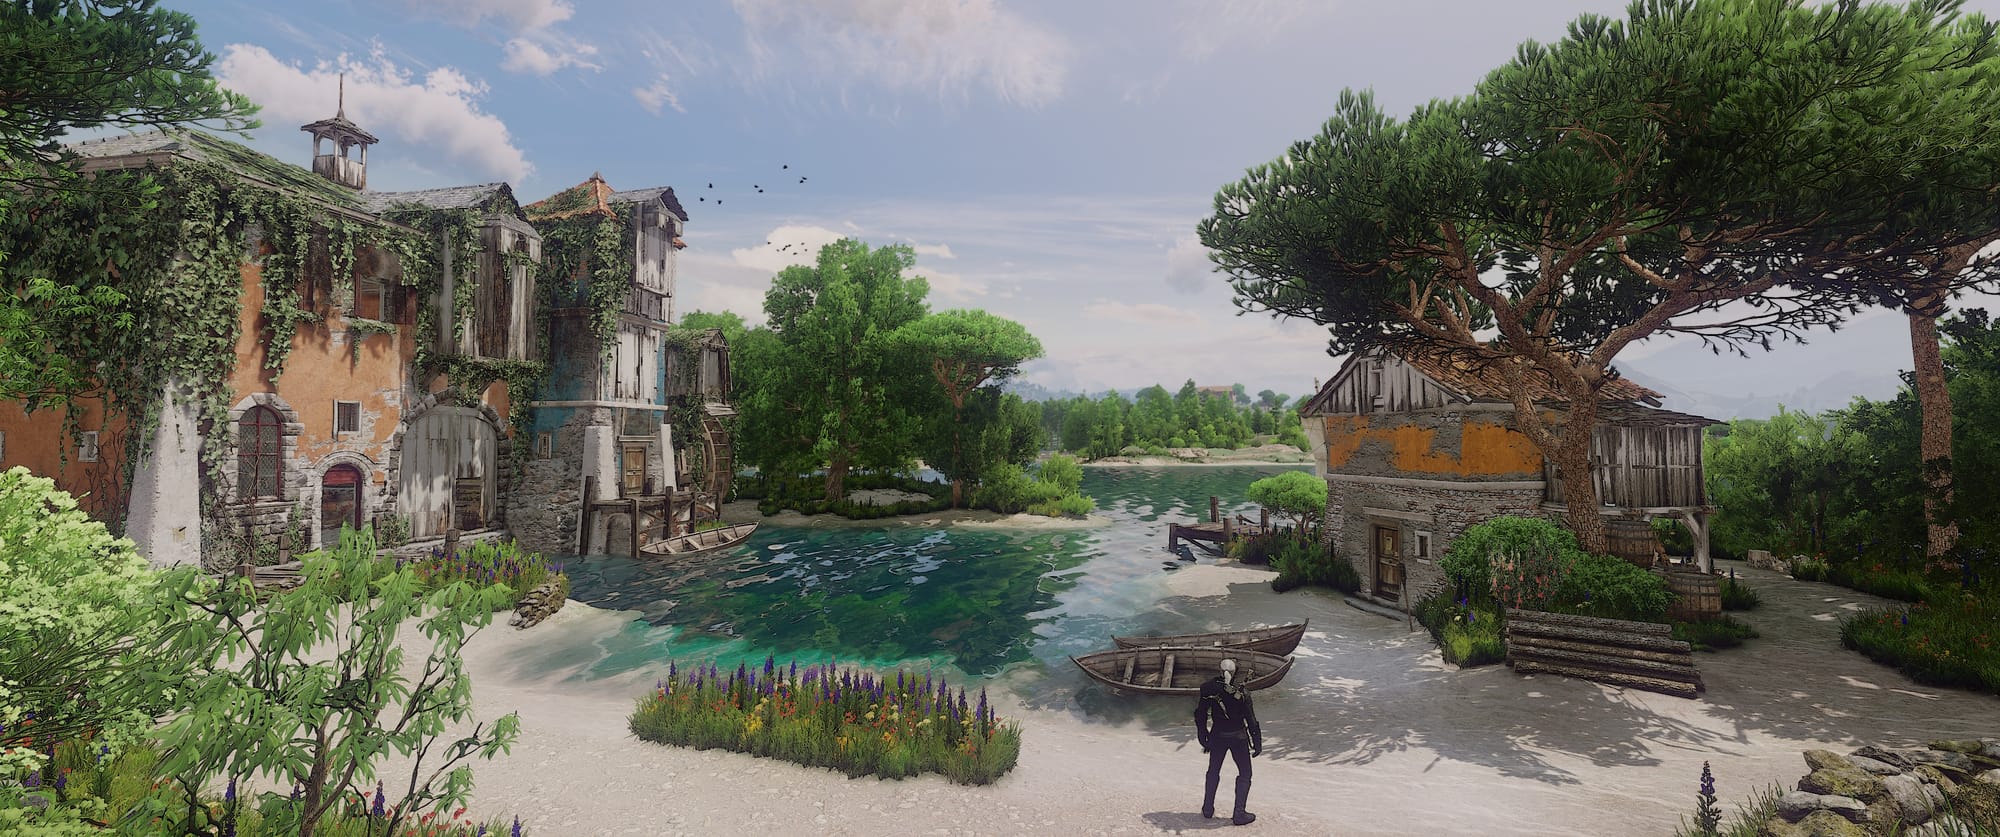
- New Toussaint Clouds
- New Clouds
- True Fires - HD Reworked Project Patch
- True Fires [true fires part 1 > mods folder]
- New Fires [true fires part 2 > dlc folder]
- Enhanced Water
- The Witcher 3 HD Reworked Project Next Gen
Some extra tips
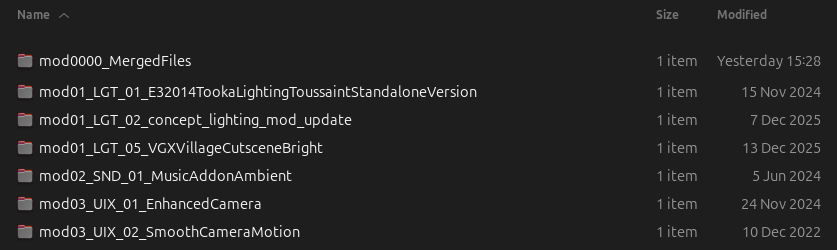
There are a couple of extra things you can do to make your life easier when modding the game.
I'd highly recommend creating a backup of your mods folder, dlc folder, and xml folder. If you ever need to re-install the game then you can easily drag and drop the majority of it back in. Some mods will require a re-install though such as HD Reworked Project and Tweaks.
I'd also recommend using a slightly more complex naming scheme to your mod files. This will save you a lot of time from having to rename a tonne of files to preserve the load order.
This is the naming scheme I prefer to use:
- Category number
- Three letter category code
- Mod number in category
- Mod name
Refer to the screenshot below to see what I mean.

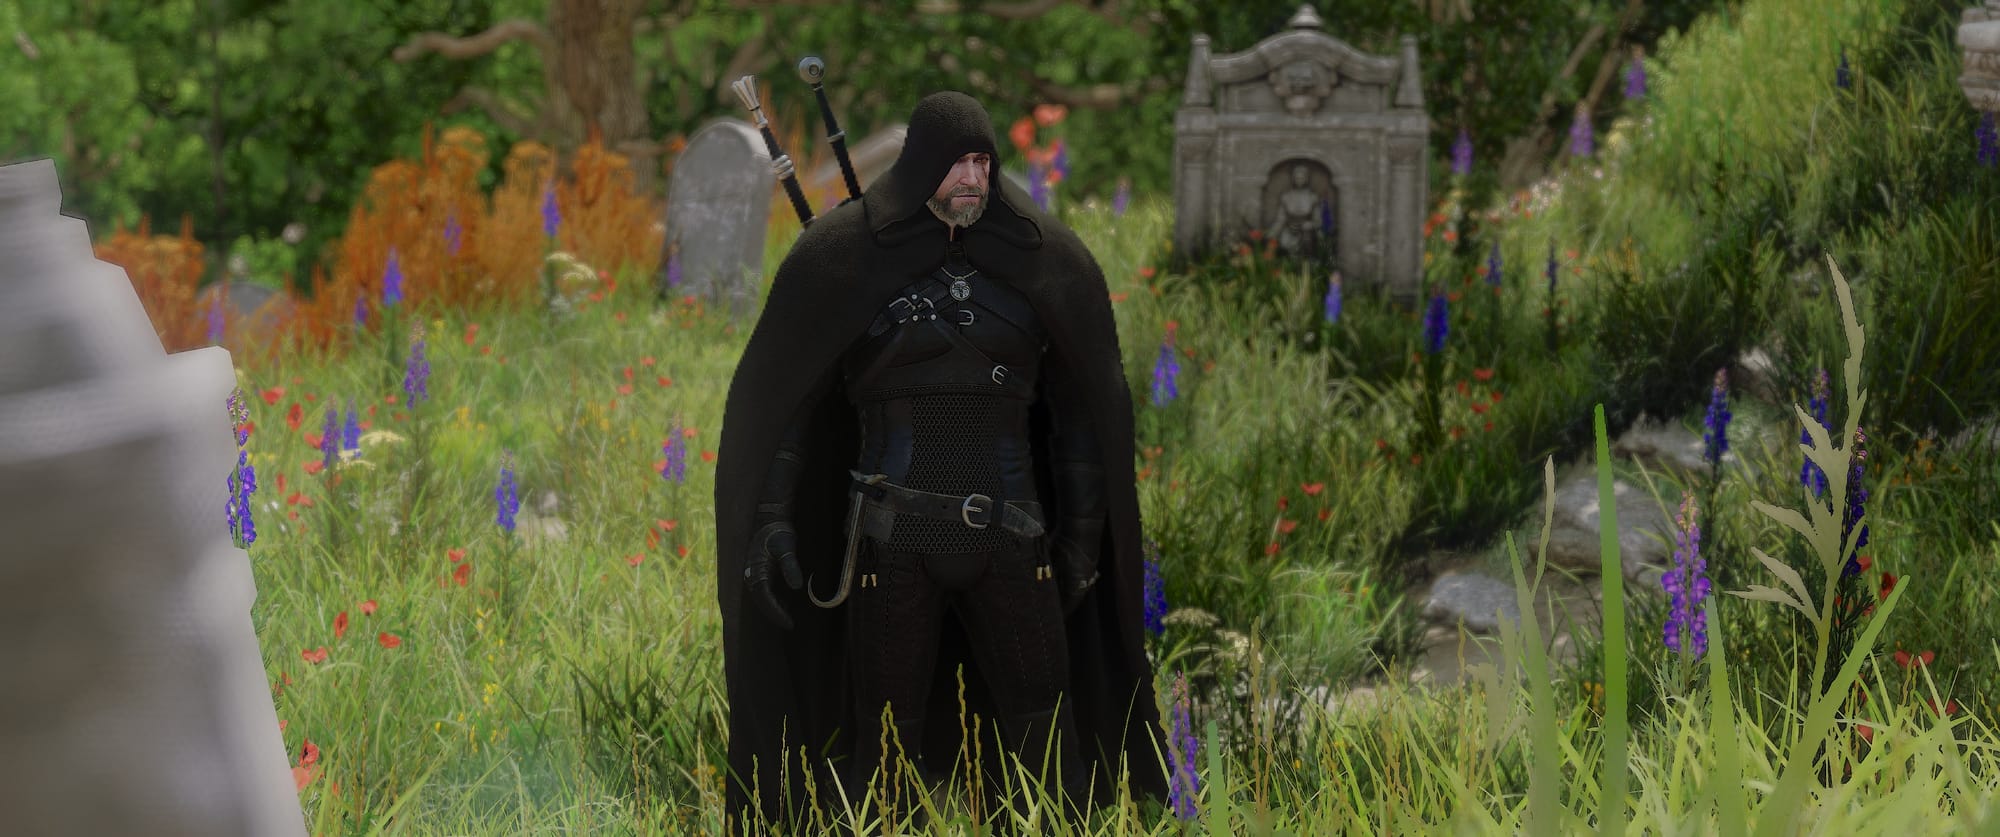


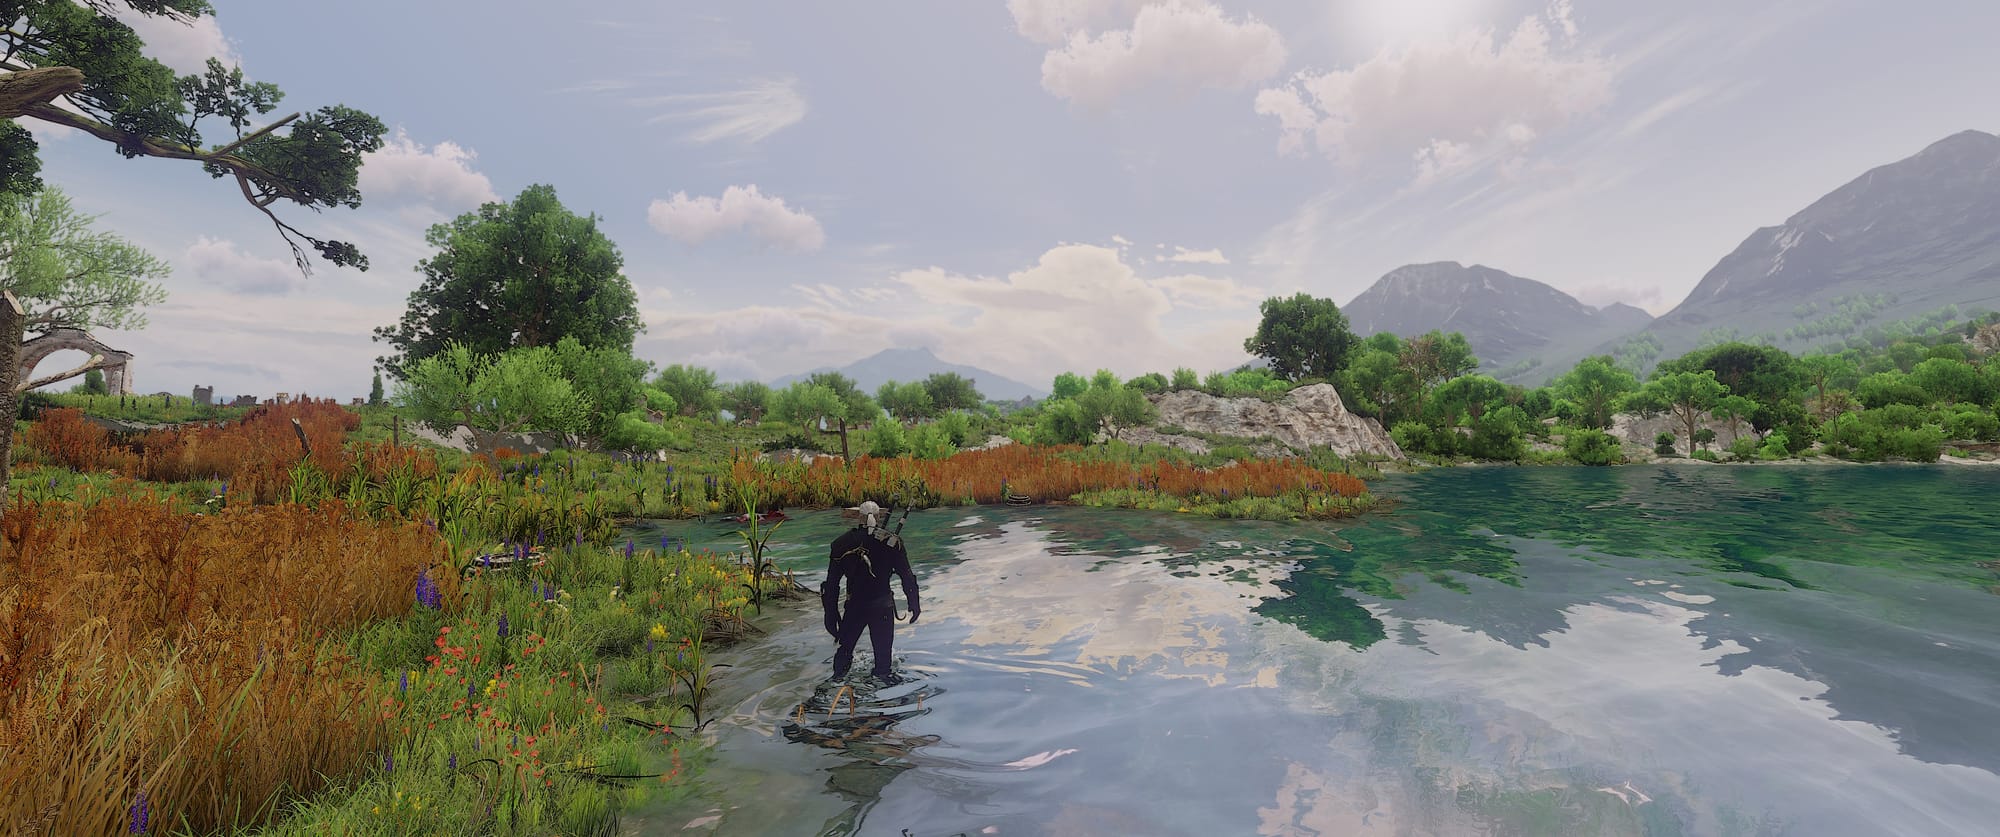
Put all these mods together and that's it! Your game is more visually impressive and beautiful than ever.
— enjoy, Sulphuric